Using Thonny
On this page we will learn
- how to set up Thonny as the editor for Space Rescue instead of VS Code
- how to create and check a virtual environment in Thonny
- how to install Pygame in Thonny
Terminology
- Thonny – a Python editor designed for beginners that comes with Python built in.
- Shell – the panel in Thonny that shows errors and
printoutput. - interpreter – the program that runs our Python code, such as the Python in our virtual environment.
- package – an extra library, such as Pygame, that we install so our program can use it.
Thonny instead of VS Code
This page finishes setting up your computer with Thonny instead of VS Code. Before you start, complete the Setup page up to and including GitHub Desktop.
Thonny is a Python editor for beginners. It comes with Python built in, which makes setup easier. Even though it's made for beginners, it has many of the features of professional editors. The lessons are written for VS Code, but everything works the same in Thonny: open MainController.py and click Run.
Install and set up Thonny
- Download Thonny from thonny.org and install it.
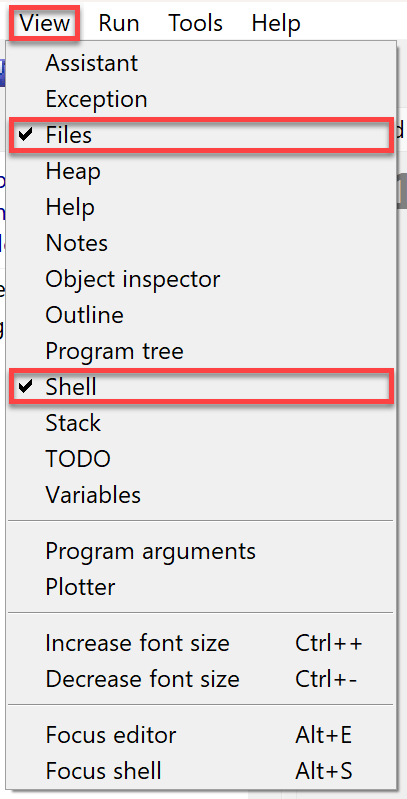
- Open Thonny, open the View menu and tick Files and Shell.
- Why: the Files panel lets us move around the GameFrame folders, and the Shell shows errors and
printoutput. - Result: the Files panel appears on the left and the Shell at the bottom.
- Why: the Files panel lets us move around the GameFrame folders, and the Shell shows errors and
Get the game files
GameFrame
GameFrame was developed by Steven Tucker, a Queensland teacher. The latest version is on his GitLab repo.
We'll use a repo that has a modified version of GameFrame and all the images and sounds for Space Rescue. We need to clone (copy) it from GitHub.
-
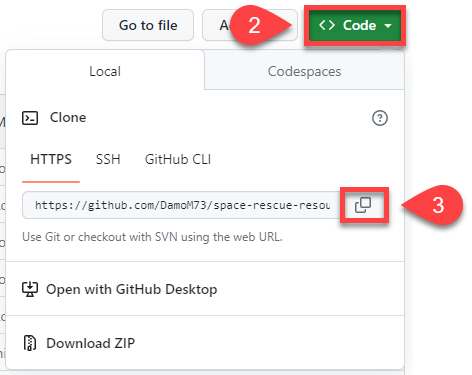
Go to the Space Rescue Resources repo, click the green Code button, then click the copy button beside the HTTPS URL.
-
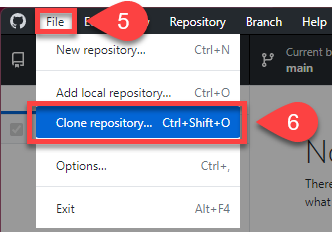
In GitHub Desktop, open the File menu and click Clone repository.
-
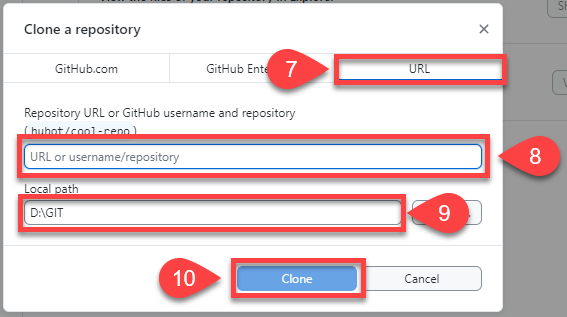
Choose the URL tab and paste the URL into the URL or username/repository box.
-
Write down the Local path, because we'll need to find this folder in Thonny. Then click Clone.
- Result: GitHub Desktop shows space-rescue-resources as the Current repository.
Open the repo in Thonny
-
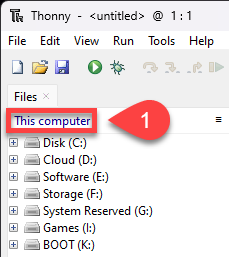
In Thonny's Files panel, click This computer.
-
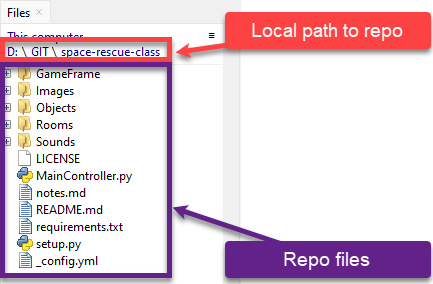
Click through the drives and folders until you reach the Local path you wrote down.
- Result: the Files panel shows the same files as the image below.
Virtual environment
A virtual environment keeps each Python project separate. Each project gets its own space with its own Python setup and libraries, so changes in one project don't affect another. It's like giving each project its own room with its own tools.
Create a virtual environment
Be in the repo folder first
Thonny creates the virtual environment in the folder showing in the Files panel, so make sure the Files panel is showing your repo folder.
-
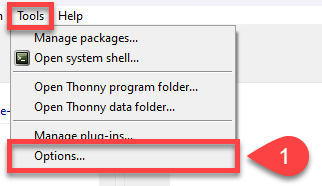
Open the Tools menu and choose Options...
-
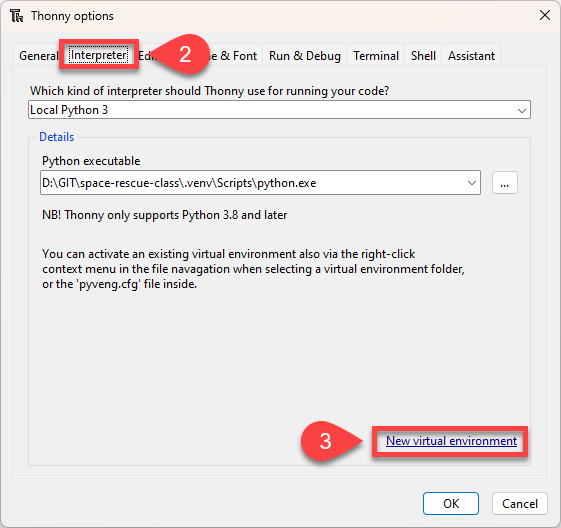
Click the Interpreter tab, then click New virtual environment.
-
Click OK on the Creating new virtual environment message.
-
In the folder dialogue, right-click in the white space and choose New → Folder.
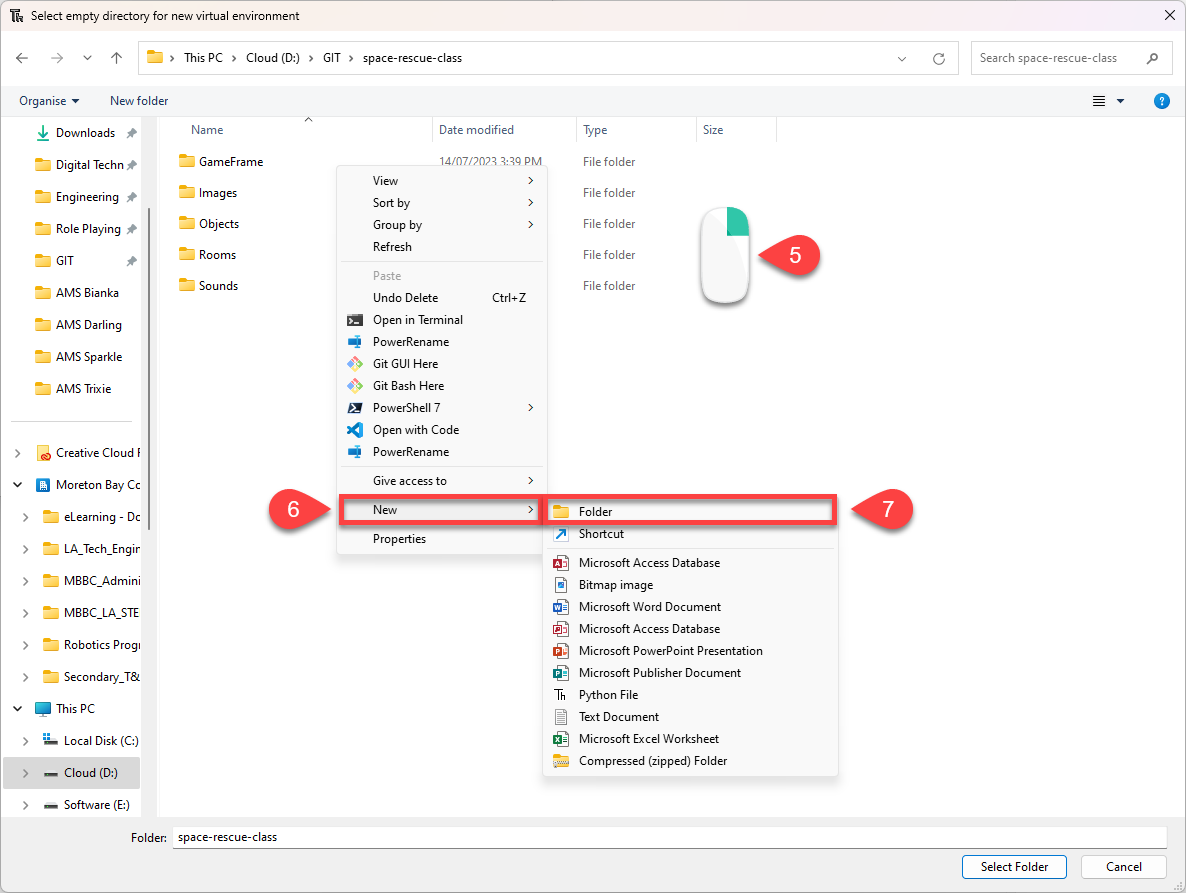
-
Name the new folder venv, make sure it's highlighted, and click Select.
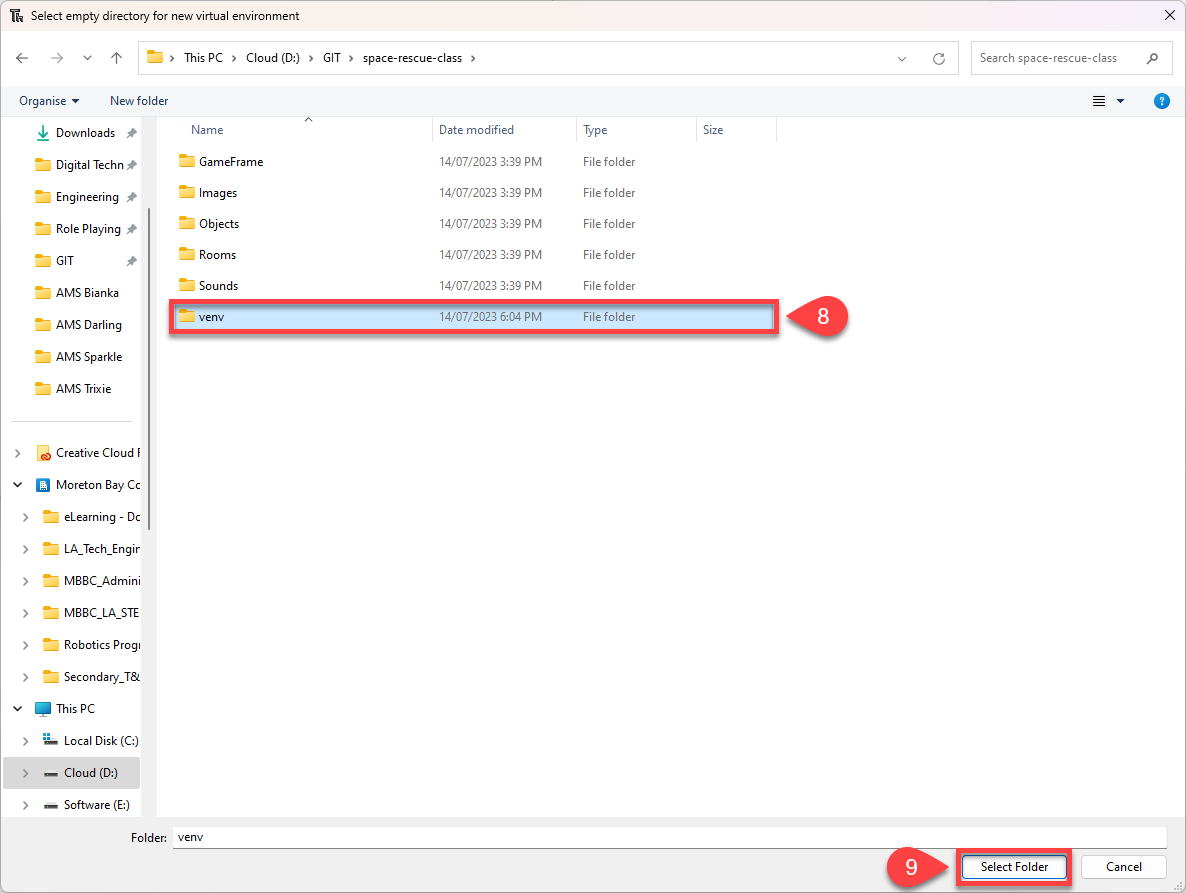
-
Wait for the Creating virtual environment message to close.
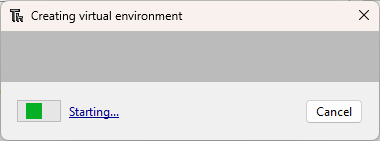
-
Check the Python executable points to the venv folder in your repo, then click OK.
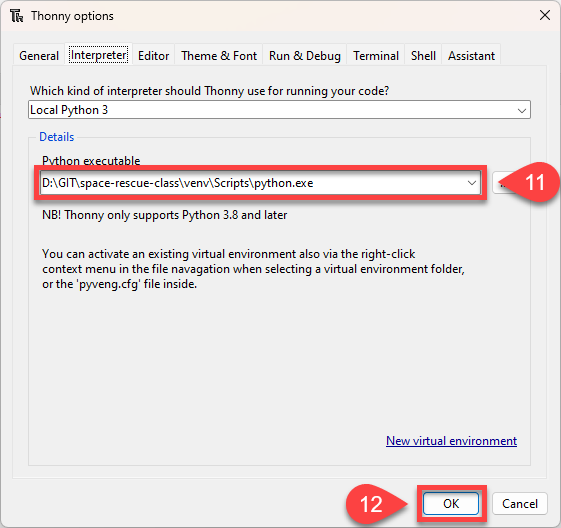
Install Pygame
The new virtual environment is empty, so we need to install Pygame into it.
- Open the Tools menu and choose Manage packages...
- Search for pygame, click it in the results, then click Install.
- Result: Thonny shows Pygame as installed. Close the window.
Check the virtual environment
Each time you open Thonny, make sure the virtual environment is active. The Python version in the Shell should point to your venv folder.

If it doesn't:
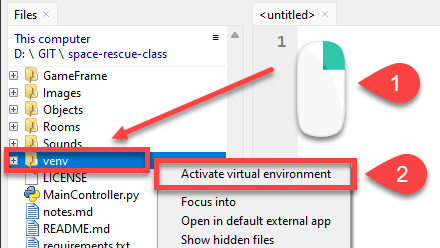
- Right-click the venv folder in the Files panel.
- Choose Activate virtual environment.
- Result: the Shell restarts and points to venv.
First commit and push
Let's make a small change, then commit and push it, so our own copy of the repo is on GitHub. The Git terms are explained on the Setup page.
-
Open README.md, replace its contents with the text below and save it.
-
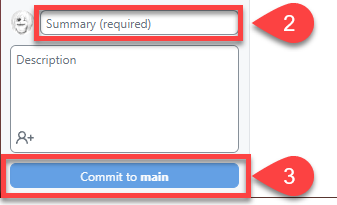
In GitHub Desktop, type Made first change in the Summary (required) box and click Commit to main.
-
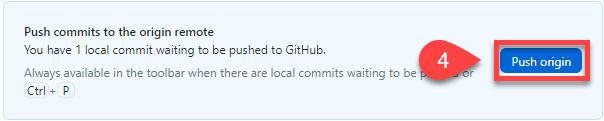
Click Push origin.
- Result: an error appears, because the repo belongs to someone else.
-
Choose Fork this repository, then For my own purposes, and click Continue.
- Click Push origin again.
- Result: our commit is now on GitHub, in our own copy of the repo.