The Assessments Table
Now that we have the user all sorted, it is time to start working on the assessments aspect of the website. To do this we will need to store all the assessment details in a table. This information doesn’t belong in the user table, so we will need to store it in a new table.
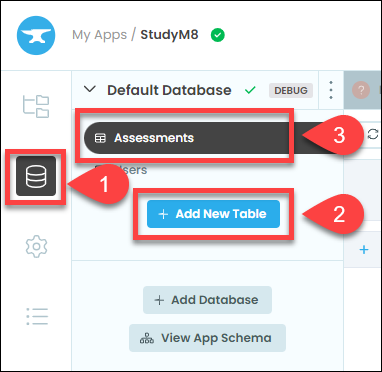
Create new table
First we will need to create a new table:
Go to the data menu
Click on + Add New Table in the submenu
Name the table Assessments

Add columns
User column
Now that the table is created we need to add columns.
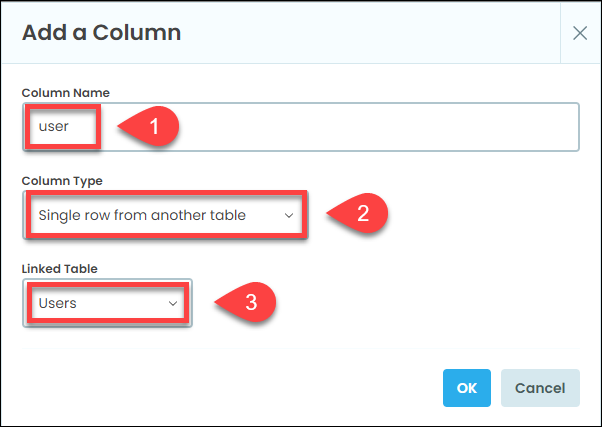
The first column is very important, as it will link the assessment item with the correct user. Click on + New Column then:
Type user as the column name
Choose Single row from another table from the Column Type dropdown
Choose Users from the Linked Table dropdown
Importance of the user column
This web app can accomodate multiple users. Each user will be able to enter their own assessment details. Therefore, when the assessment details are saved, is it important to identify which user each assessment item belongs to. We use the user column to do this.

Other Columns
Now add the other columns by clicking the + sign. The column details are below.
Column Name |
Column Type |
|---|---|
subject |
Text |
details |
Text |
start_date |
Date |
due_date |
Date |
completed |
True/False |
Testing
This is all the columns we should need. When you have finished your table should look as per below.
