Adding Users
Anvil provides a range of useful features. One of these features is user management. The user management tool simplifies the process of handling user signups, logins, and permissions within an Anvil application. It provides built-in functions to manage user authentication and maintain user data securely.
In this tutorial we will set up the user management system. In the next tutorial we will incorporate it’s features into our website.
Setting up user management
To setup our user management click on the Add button on the sidebar

Then choose Users

Notice that there is a new User icon in the sidebar. This is how you can get back to this page.
![]()
On the Users page:
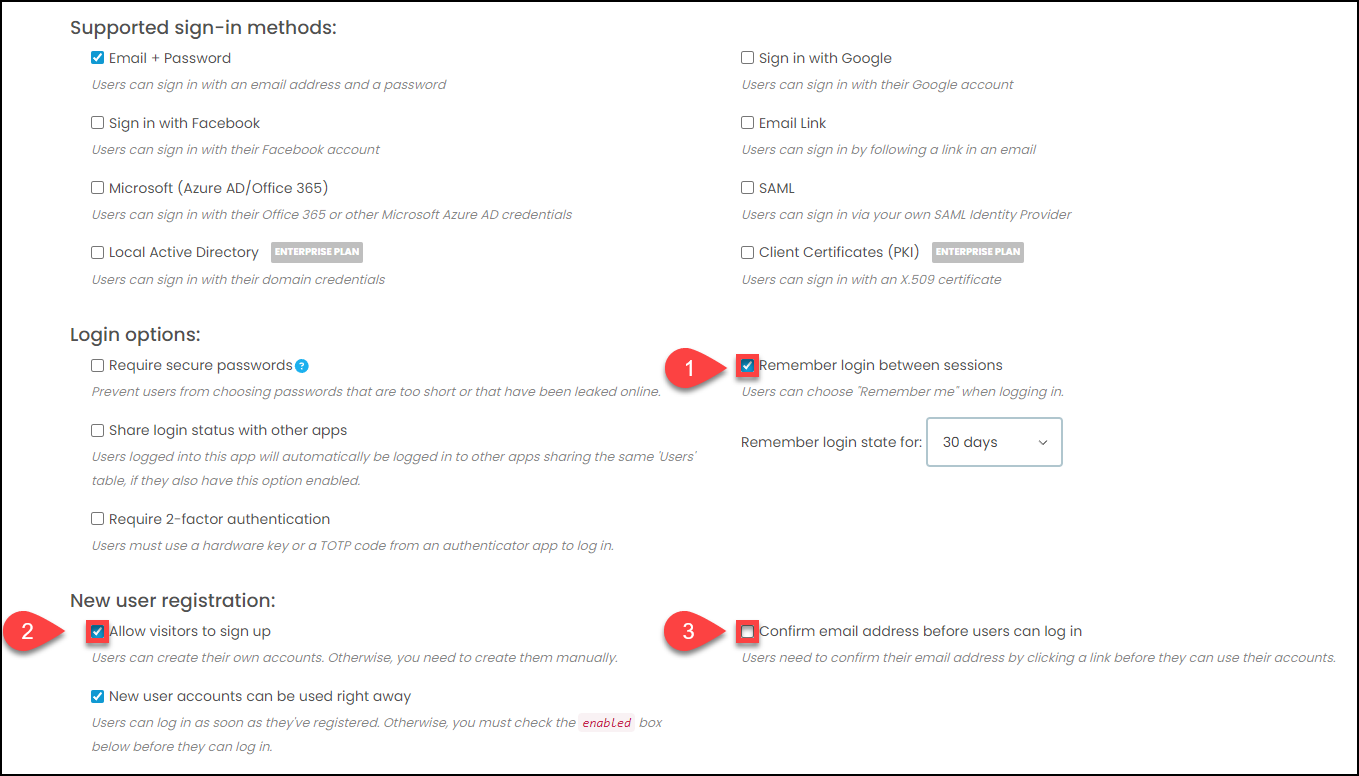
Select the checkbox for Remember login between sessions → will save you login in every time you launch your website.
the default 30 days will be fine.
Select the checkbox for Allow visitors to sign up → will allow you to use the registration system.
Deselect the checkbox for Confirm email address before users can log in → will allow you to use bogus emails for development.

That’s all our setting done.
You can see that there are a heap more user settings. You may choose to turn some of these on in the future, but the current settings will make development run more smoothly.
Adding Fields
Down the bottom of the Users page, you will notice the users table. This table will store the details of all the users who register on your website. Most of the columns as self evident, but there are two more that we want to add:
first_name
last_name
Scroll the table all the way to the right then click on the plus sign to add a new column.
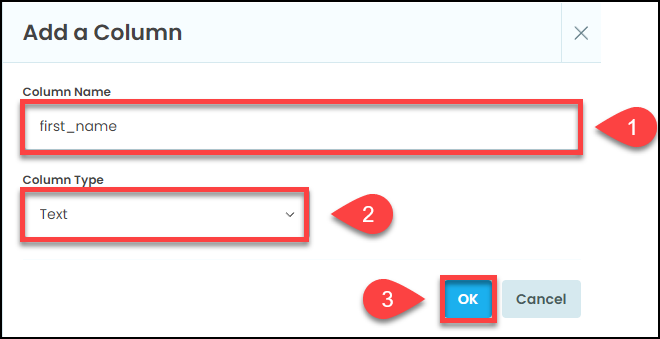
In the Add a Column dialogue:
Name the column first_name
Choose Text as the Column Type
Then click OK

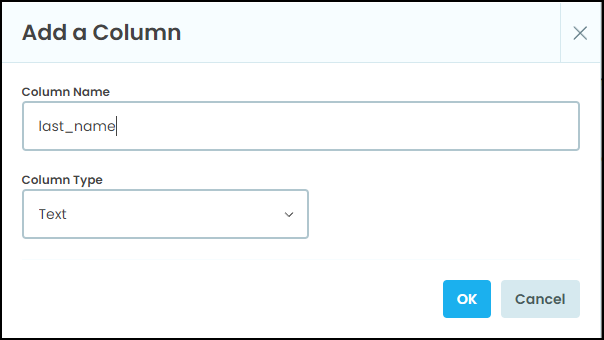
Now add another column called last_name

That’s it. Your user management tool is now ready.