Create the Main Form
Almost time to start making our website, but before we do, there is one last concept we need to understand.
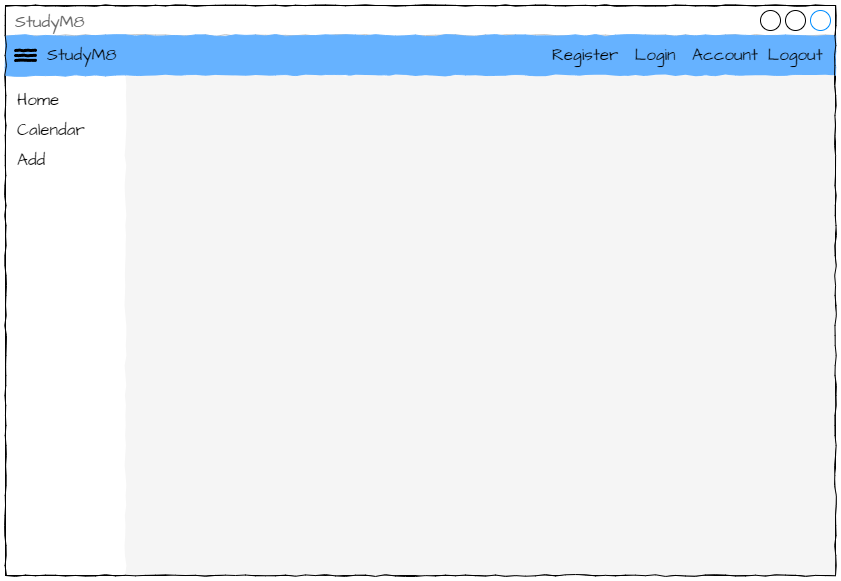
Looking at our wireframes you will notice that they all look very similar. The top bar, and the side menu all look the same, it is only the main content in the grey centre panel that changes. As the user navigates from one page to another, we could just send the entire page’s data each time, but this is extremely inefficient.
In our frontend backend diagram, it is the communication over the internet between frontend and backend (the lightening bolt) that is the slowest.

This means it is faster to minimise the amount of data being transferred. When changing from the Home page to the Calendar page, why send the side menu data when it is already on the user’s computer. This is where Single-Page Applications come in.
Single-Page Applications
A Single-Page Application doesn’t reload every time the user navigates to a new page, but rather, it only loads the parts of the website that change. This approach results in a smoother, faster user experience similar to that of a desktop application.
How does it work? Initially a main form is loaded containing the content that remains constant. Then different components or views are swapped in and out based on user interactions, this is called dynamic loading.
In our design our main form would look something like this:

The parts that get dynamically loaded are called components, but we’ll deal with those in the next tutorial. For now, lets create our main form.
The MainForm
Anvil already has the start of your MainForm opened for you. If you cannot see it go:
Files in the side menu
Form1 in the submenu

Rename Form1
Form1 is a poor name for this file. So we will rename it to MainForm (check your spelling and capitalisation).
Naming Conventions
We are now making quite complex applications. The finished app will consist of 11 different files, and over 50 componets. All of these are named and some of the names are very similar. Therefore it is important to use naming conventions.
Naming conventions include information that makes it easier to remember what the component is. For example, all links will start with the word link, all web components will be in camel case and have the word component appended to the end (eg. CalendarComponent)
It seems like extra work, but it makes things easier by reducing your coignative load.
Click in the ellipses (three dots) then rename. Type MainForm then press enter.

Add Title
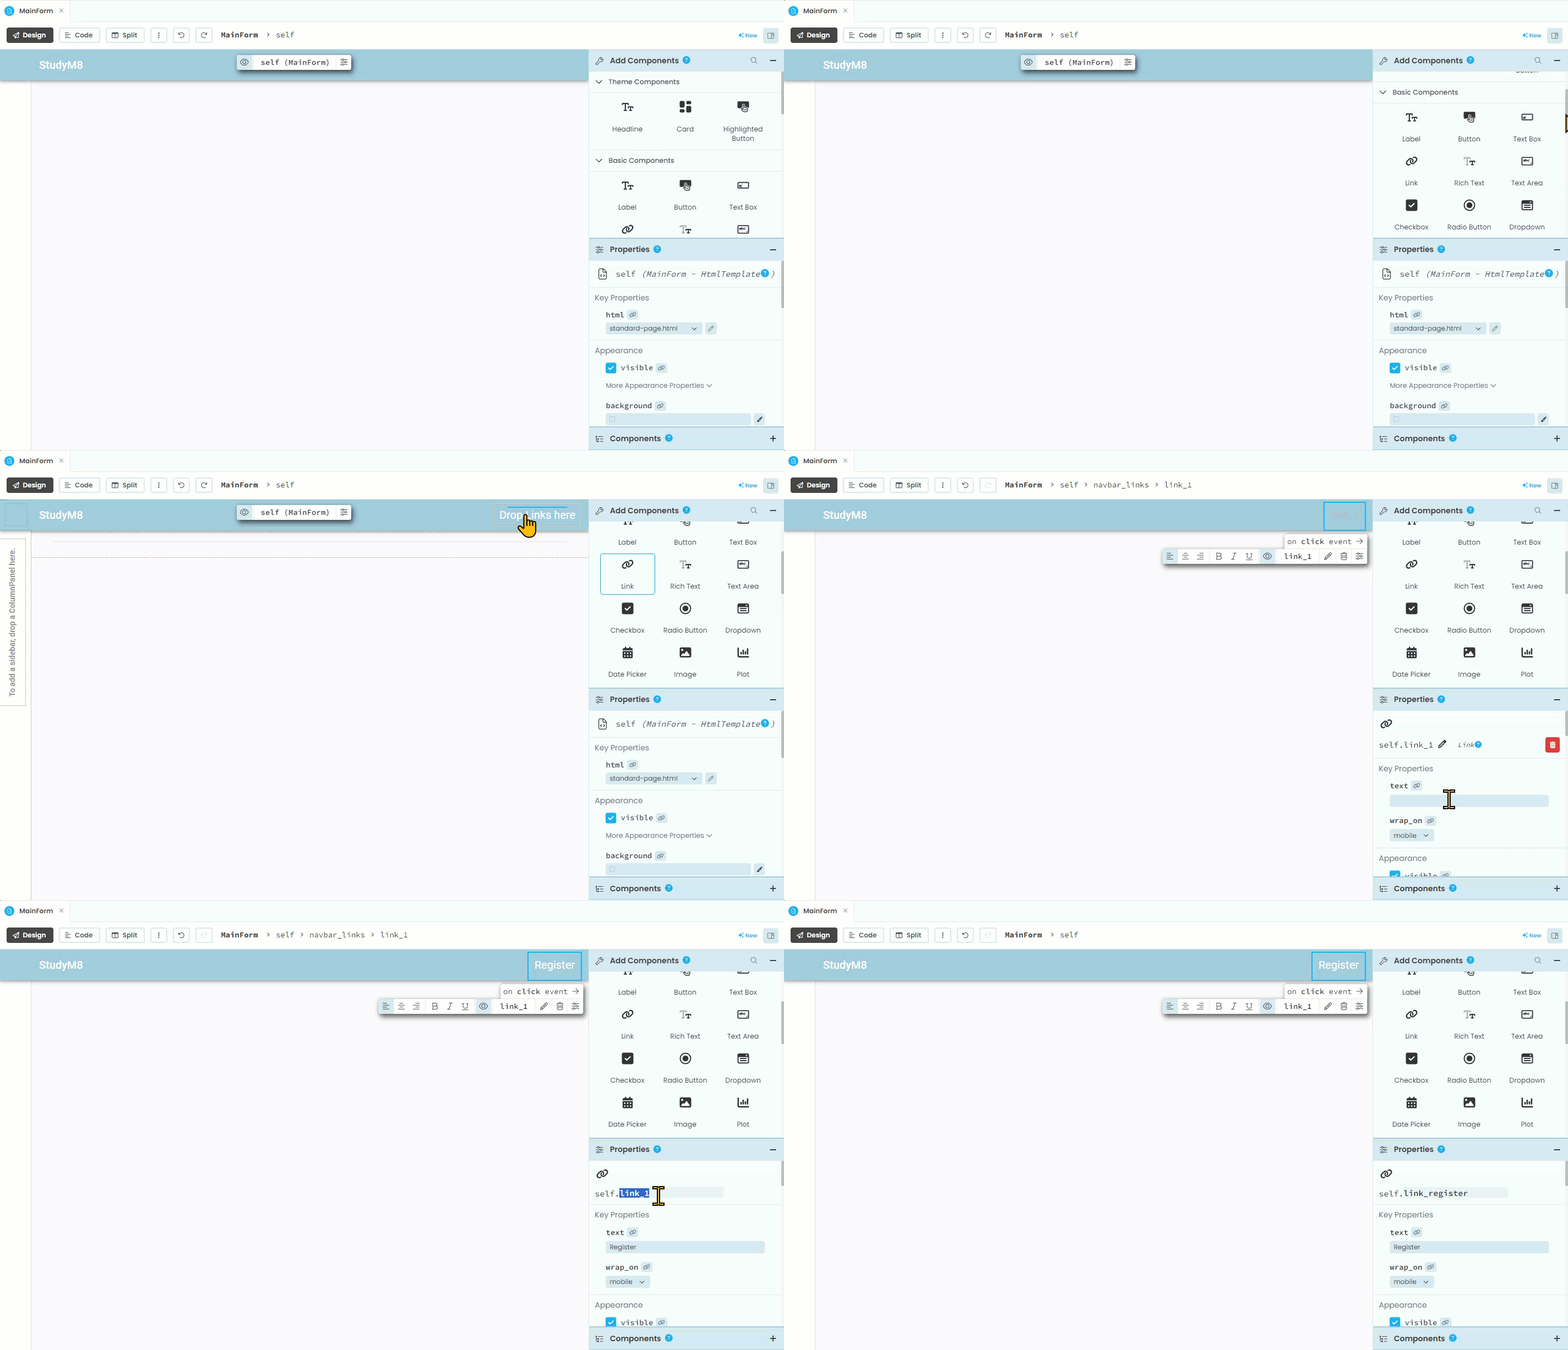
To add the top left StudyM8 title you need to:
In the Add Component section, click on Label.
Then, in the MainForm’s menu bar, click on the Drop title here box.
Go to the Properties section and in the text box add
StudyM8.Still in the Properties section, rename the label to
label_title.

Side Bar
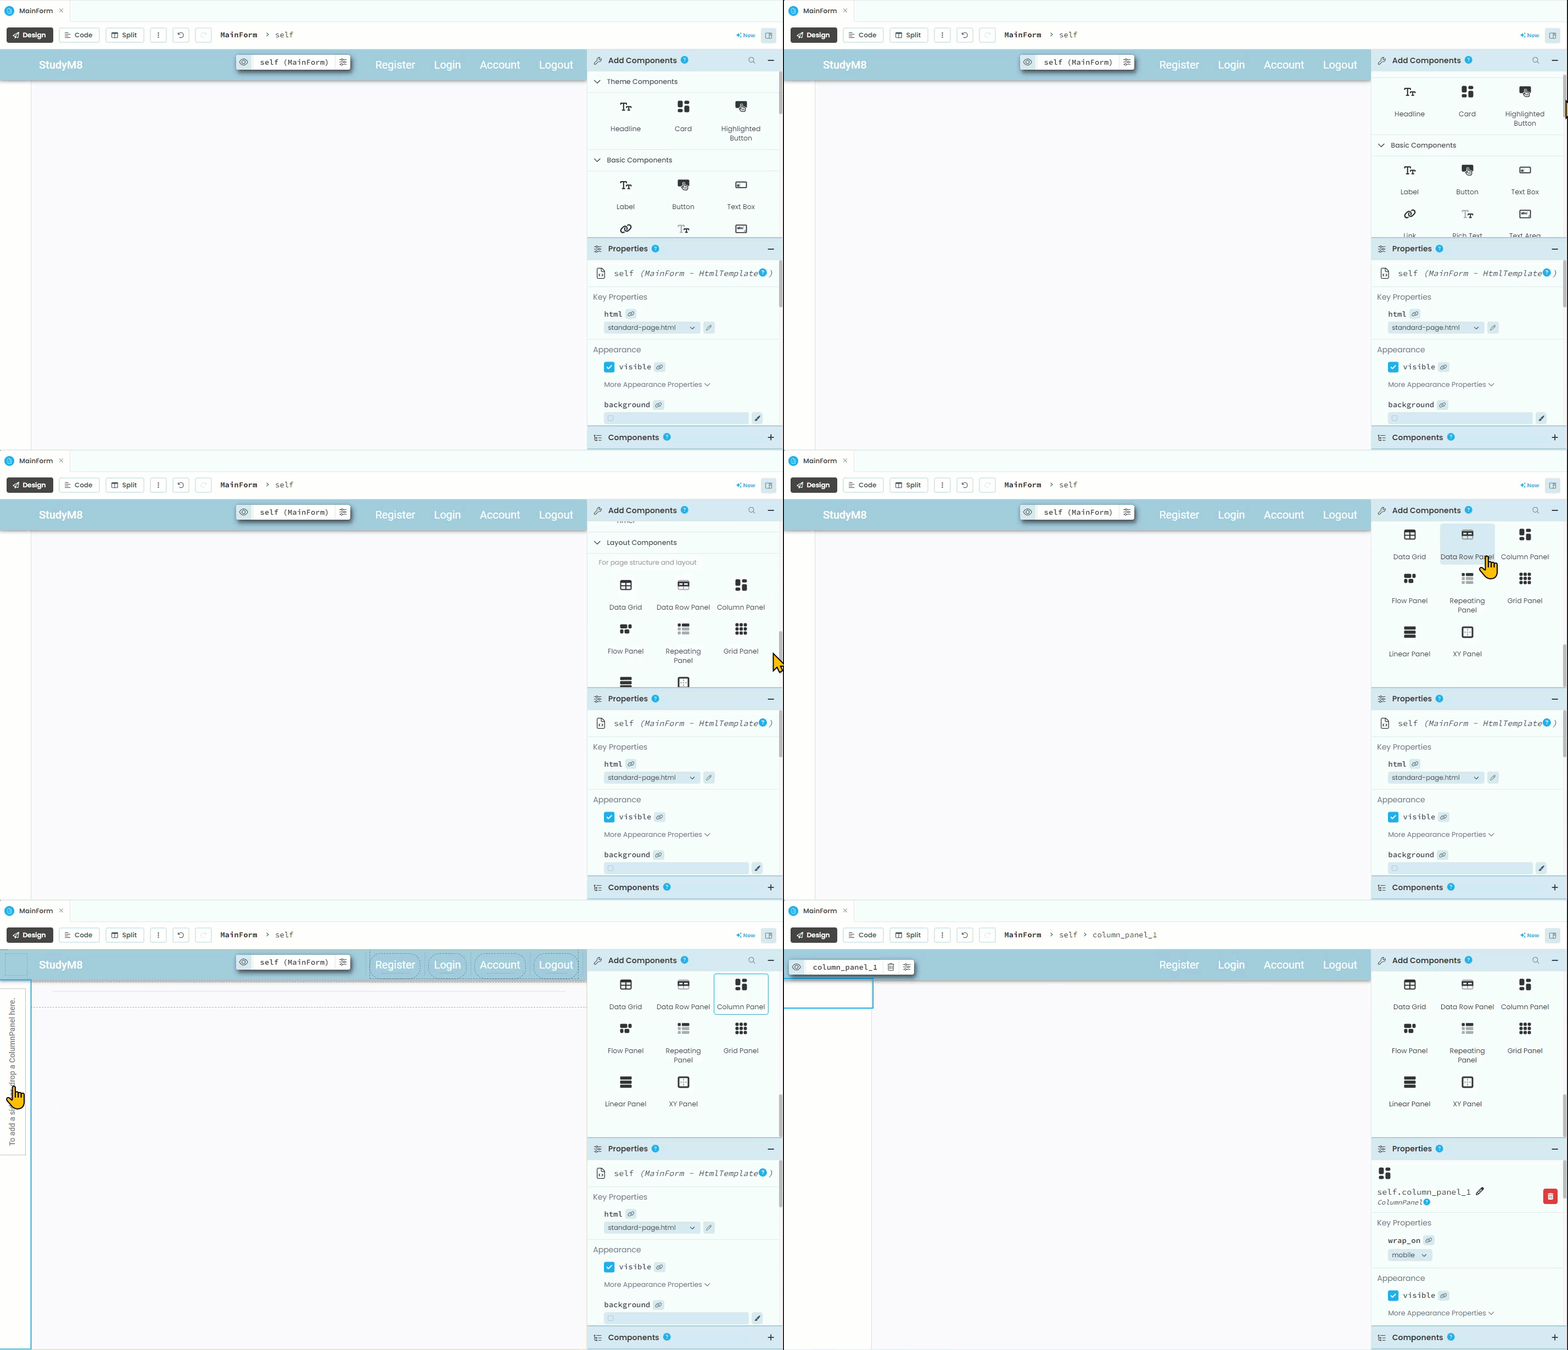
If you look at the sidebar you will see the message To add a side bar drop a ColumnPanel here. Since we want a sidebar, we better drop a ColumnPanel there.
To create the side bar:
In the Add Component section, find and click on ColumnPanel (it’s under Layout Components).
Click on the message in the sidebar section.
Since our code is not going to interact with this component, we don’t have to rename it.

Side Bar Links
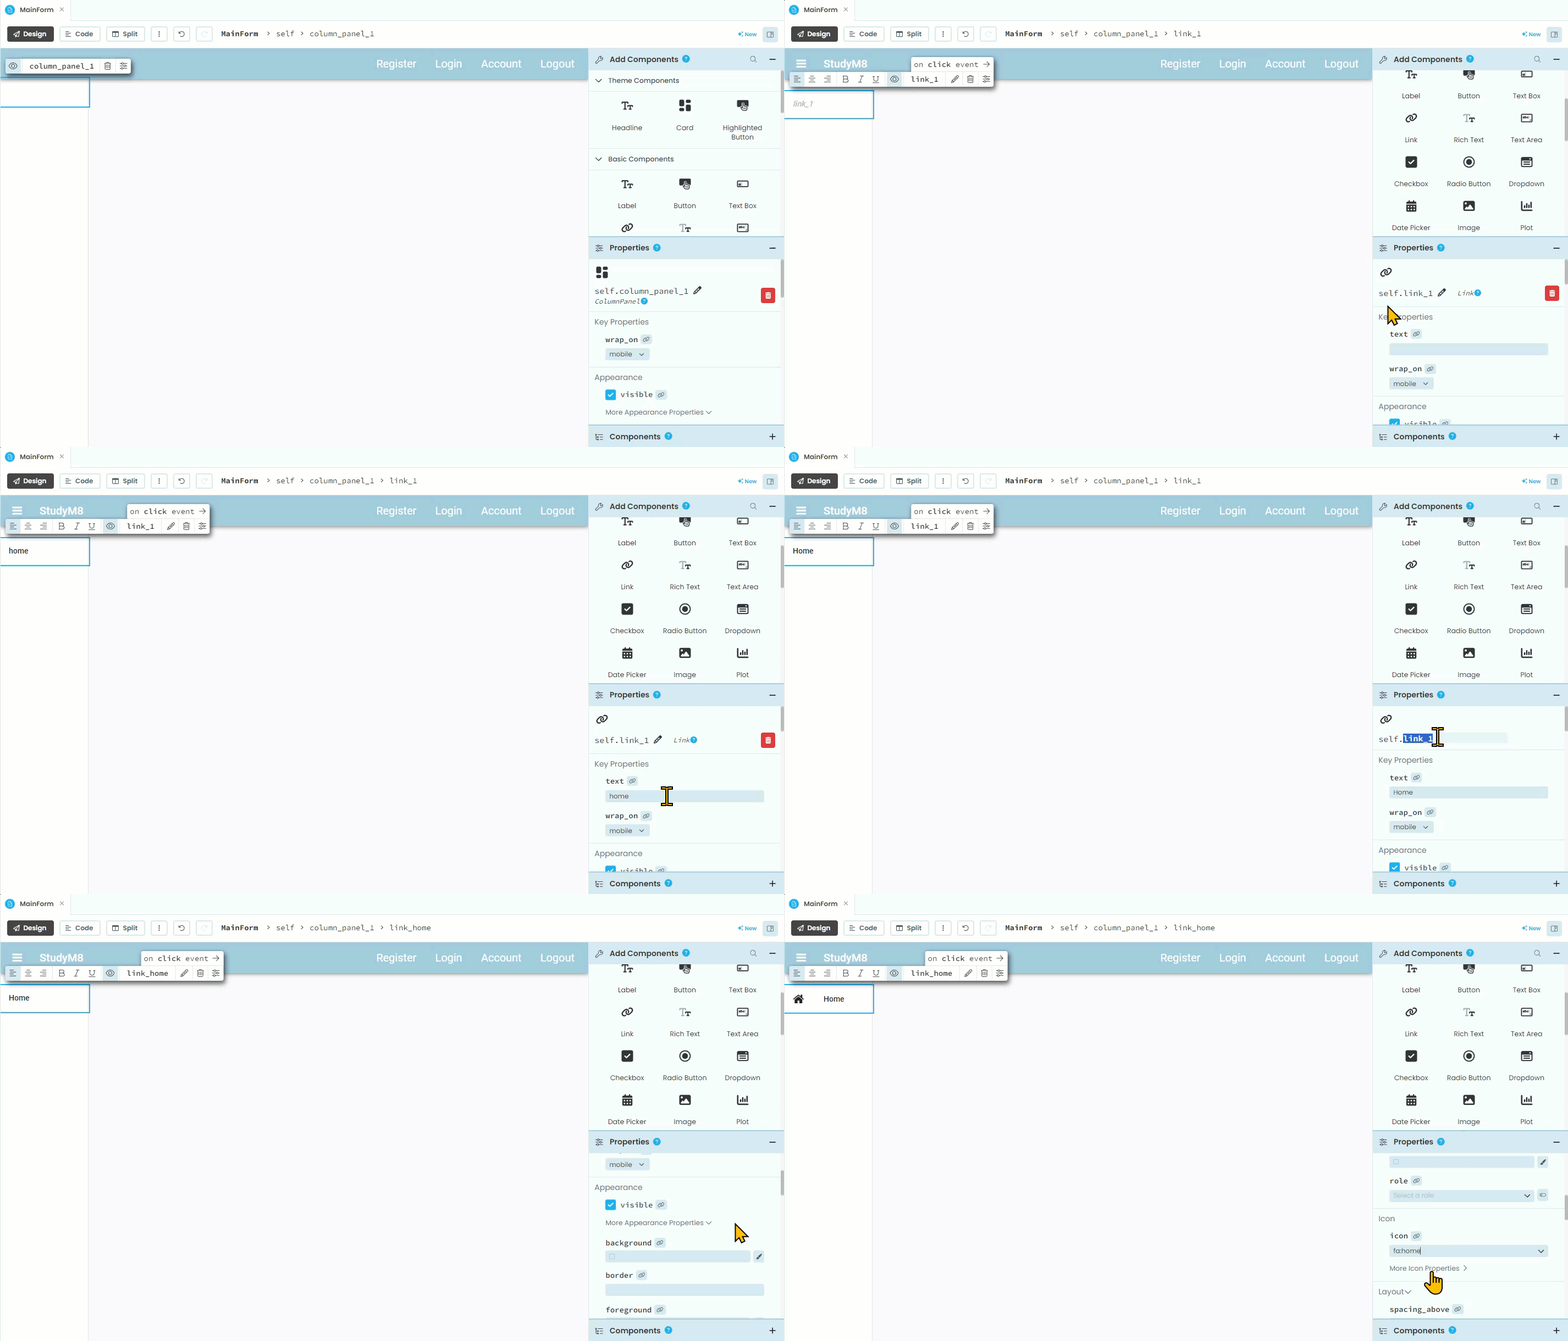
Now to add the side bar links starting with Home:
In the Add Component section, find and click on Link.
Click on the ColumnPanel in the side bar.
Go to the Properties section and in the text box add
Home.Still in the Properties section, rename the link to
link_home.In the Properties section find the Icon option and type
homethen click and choose the fa:home icon

Repeat these steps for the other two links:
Calendar
name: link_calendar
icon: fa:calendar
Add
name: link_add
icon: fa:plus-square
Testing
The layout of your MainForm is now complete. Click the green Run button and have a look at the design. It should look the same as below (except for colours).

Click on the red Stop button when you have finished.
