Setting up Thonny
On this page we will learn
- what MicroPython, the micro:bit and Thonny are
- how to connect the micro:bit and set up Thonny
- what each part of the Thonny window does
- how to get the tutorial files
Terminology
- MicroPython – a version of the Python programming language designed to run on microcontrollers.
- microcontroller – a tiny computer chip used to control devices such as robots, sensors and household appliances.
- embedded programming – writing programs that run on microcontrollers built into devices.
- micro:bit – a small, pocket-sized educational computer with buttons, a display and sensors that we can program.
- Thonny – a beginner-friendly IDE for writing and running Python and MicroPython programs.
- IDE – an Integrated Development Environment, which is an app for writing, running and fixing code.
- interpreter – the program that reads our code and runs it, such as MicroPython on the micro:bit or Python 3 on the computer.
- Shell – the part of the Thonny window that shows messages and printed output from our program.
During this course we will use Thonny to write MicroPython programs for the micro:bit. This page shows how to set everything up.
What is MicroPython?
MicroPython is a version of Python designed to run on microcontrollers. Microcontrollers are tiny computer chips used in devices such as robots, sensors and household appliances. Writing programs for microcontrollers is called embedded programming.
What is a micro:bit?
We will use an educational microcontroller called a micro:bit. It is a small, pocket-sized computer designed for learning coding and electronics. It has buttons, a display and sensors that can be programmed to do different tasks.
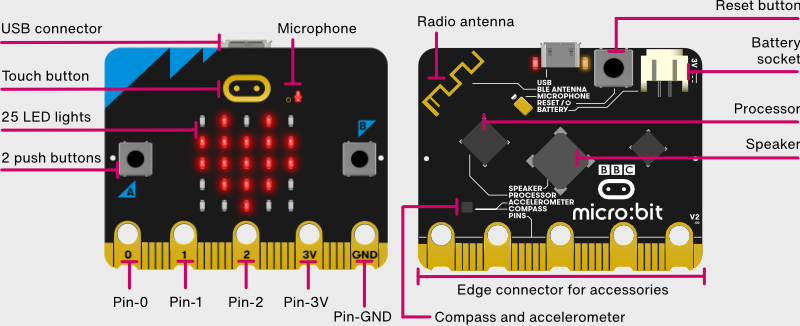
What is Thonny?
For this course we will use Thonny, an IDE (Integrated Development Environment). An IDE is an app for writing and running code. It has built-in support for MicroPython and the micro:bit. If you don't have Thonny, download it from thonny.org and install it.
Setup
1. Connect the micro:bit
Connect the micro:bit to your computer with the USB cable.

2. Change the interpreter
By default, Thonny runs programs with its own copy of Python 3. We need it to use MicroPython on the micro:bit instead.
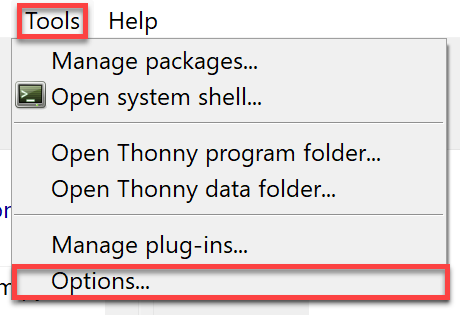
Choose Tools → Options.
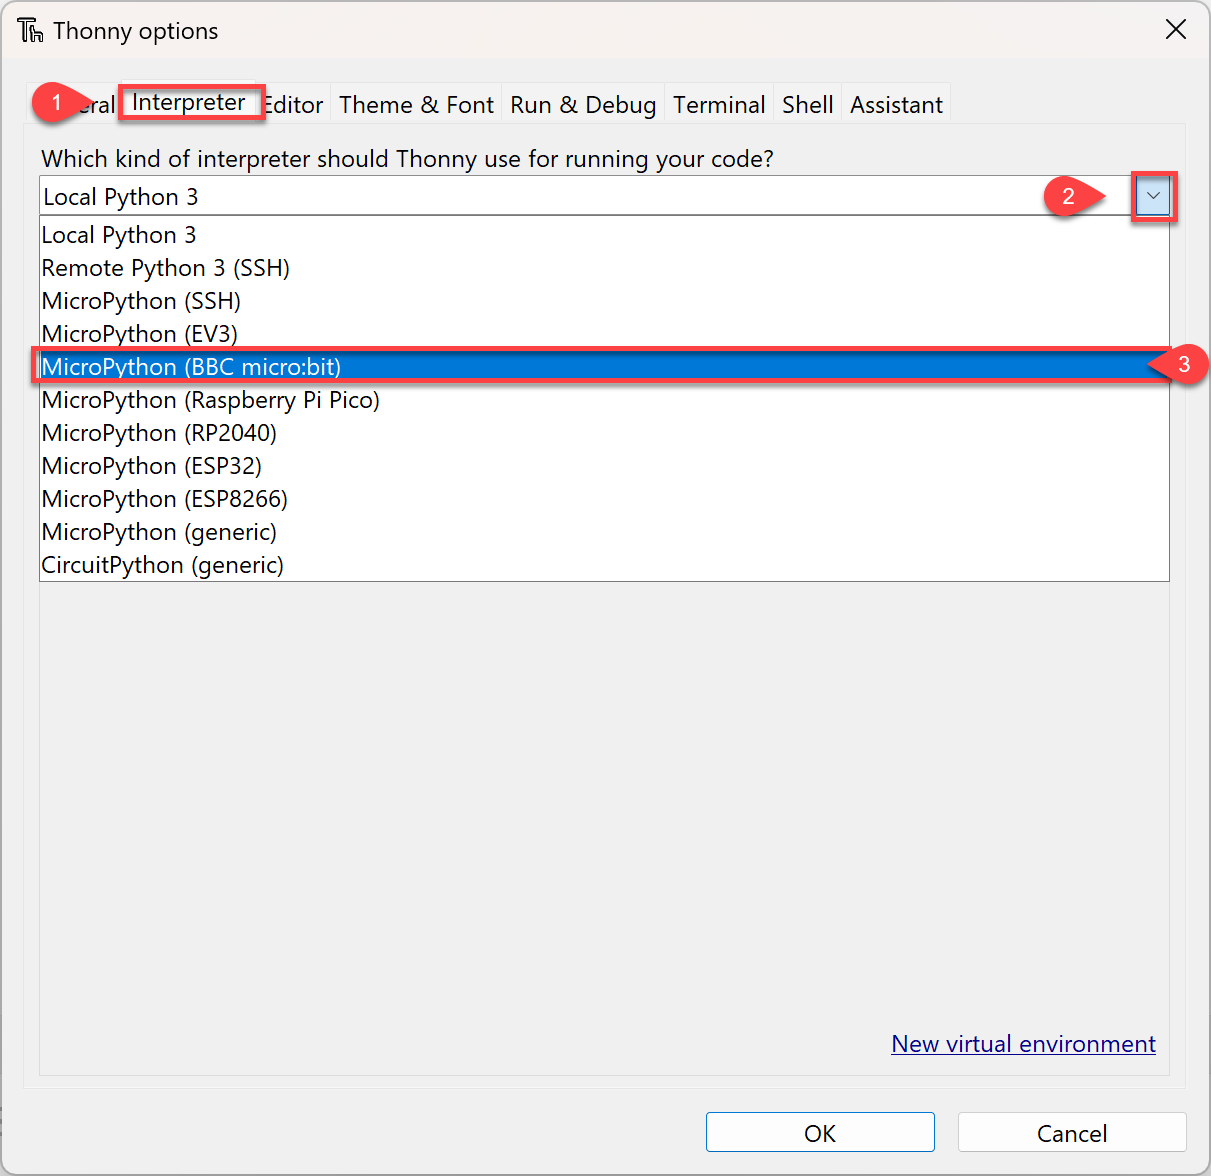
Click Interpreter, choose MicroPython (BBC micro:bit) from the dropdown.
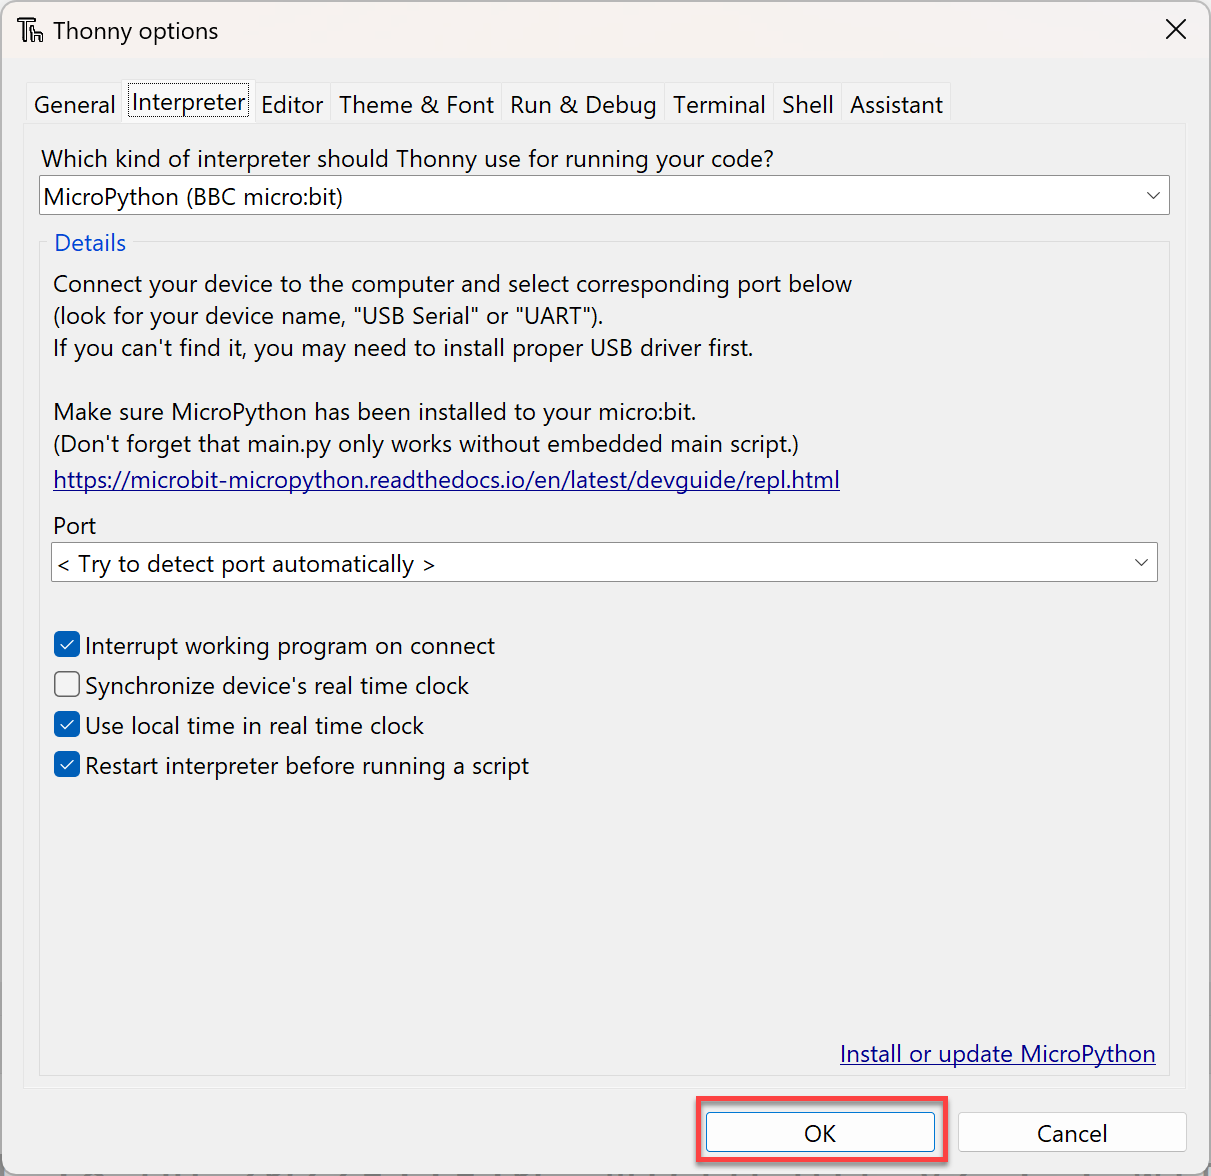
Click OK.
3. Show the Files panel
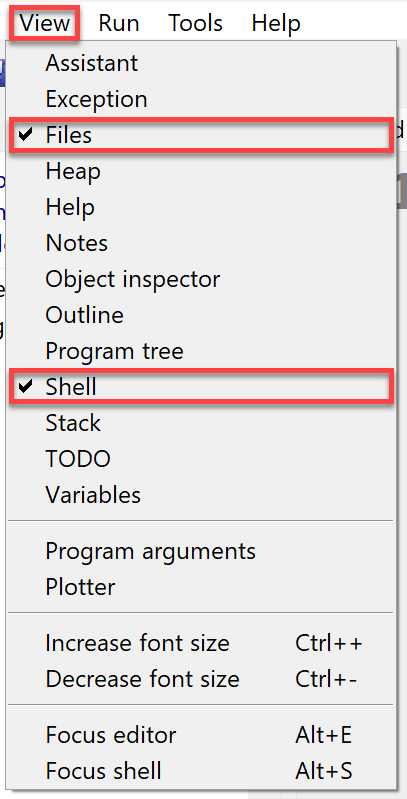
To work with files on the micro:bit, we need to show the Files panel in Thonny.
Click View and make sure Files is ticked.
4. Install MicroPython (only if needed)
Only do this if your teacher asks you to, or if the micro:bit is not working properly with Thonny.
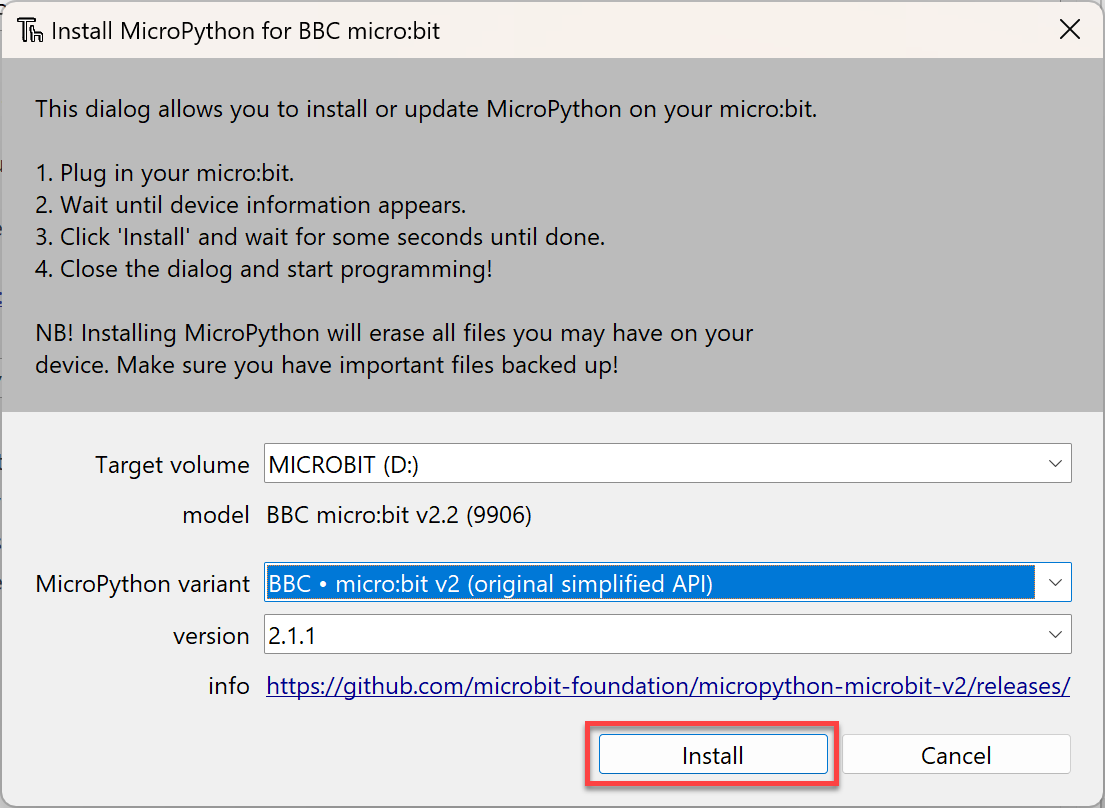
Go back to Tools → Options → Interpreter and click Install or update MicroPython.
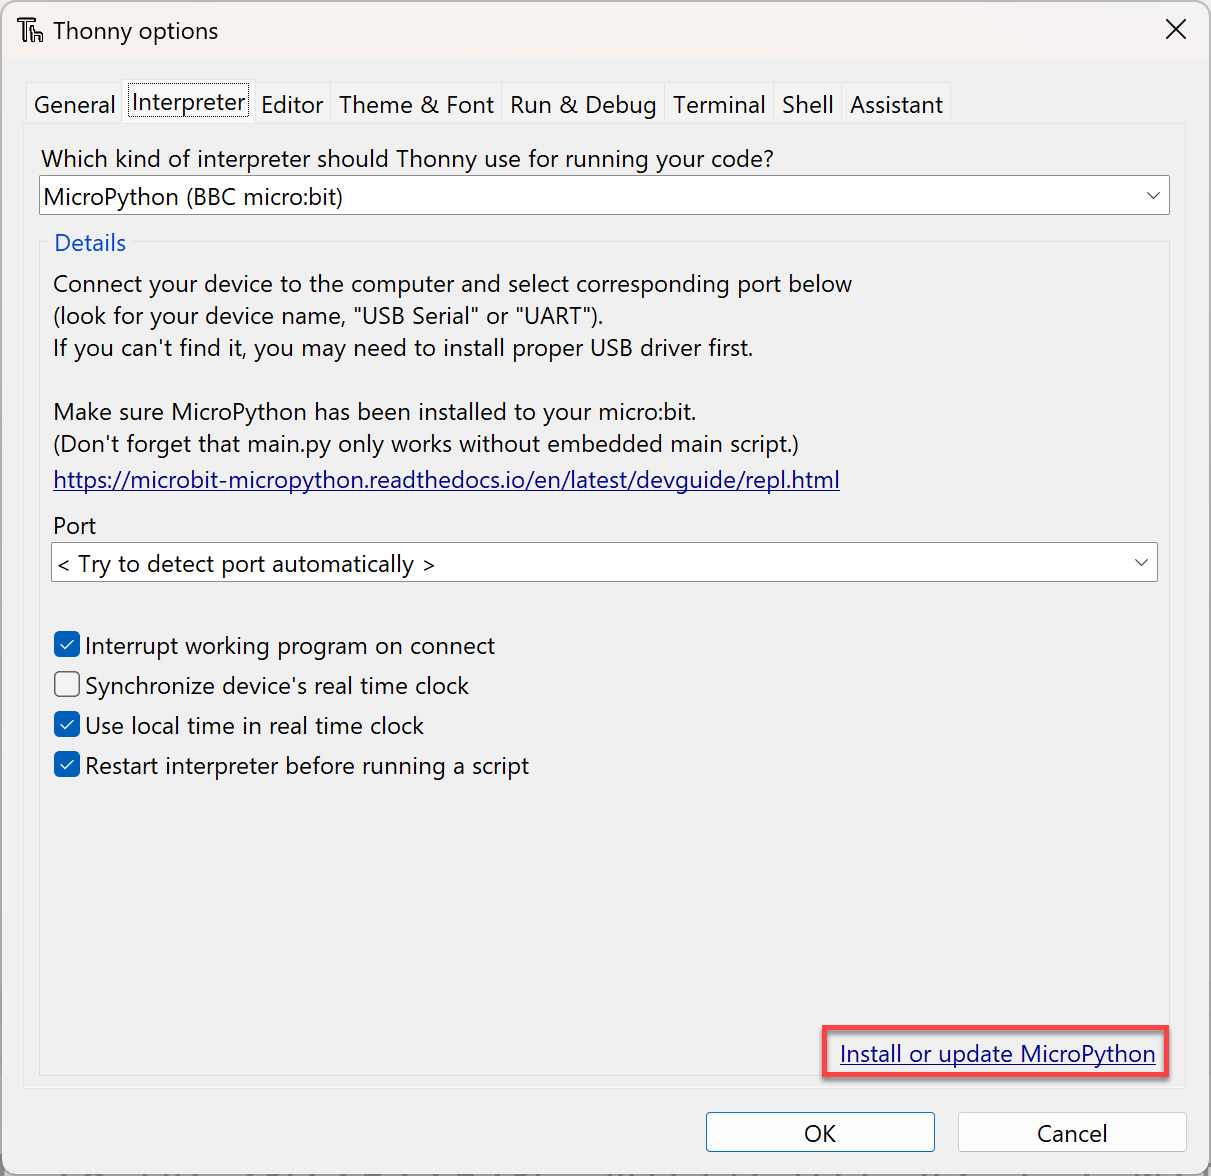
Open the Target volume dropdown and select MICROBIT. Your drive letter may be different.
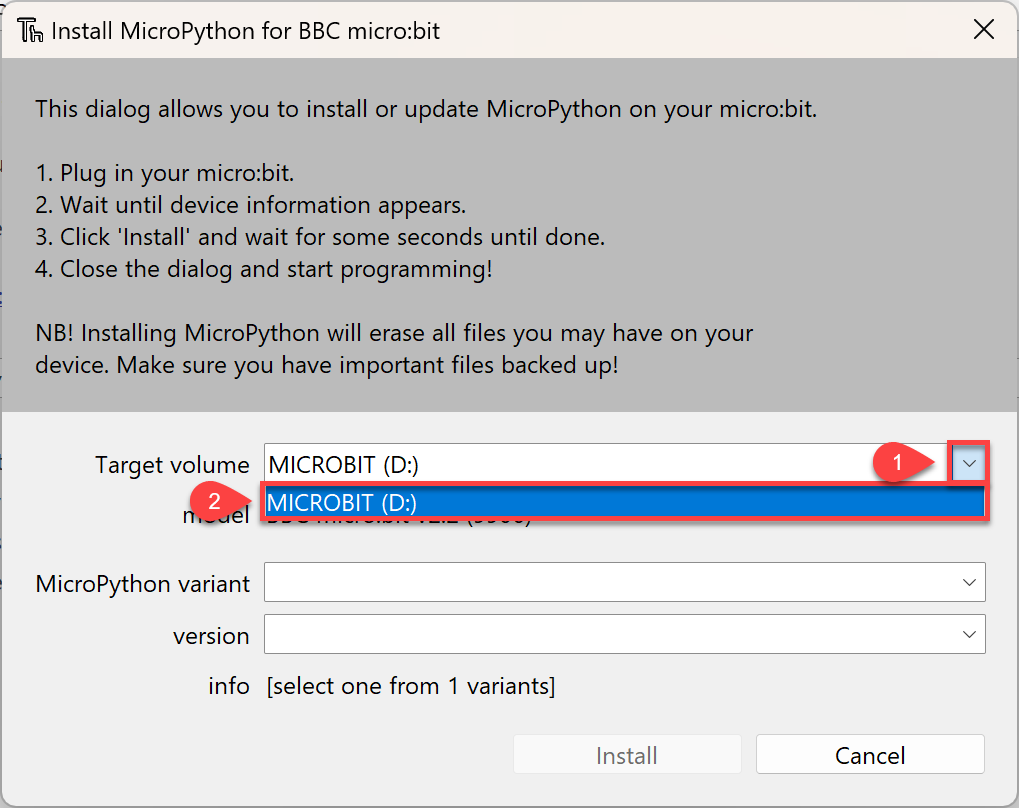
Open the MicroPython variant dropdown and select BBC micro:bit v2 (original simplified API).
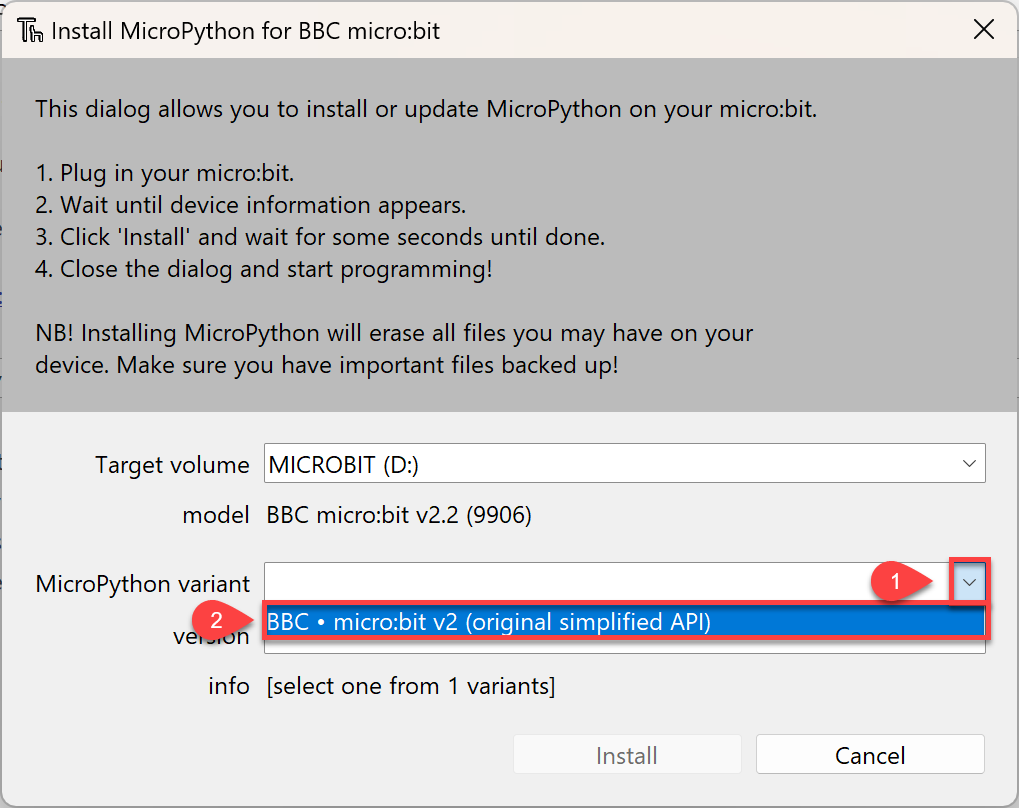
Click Install.
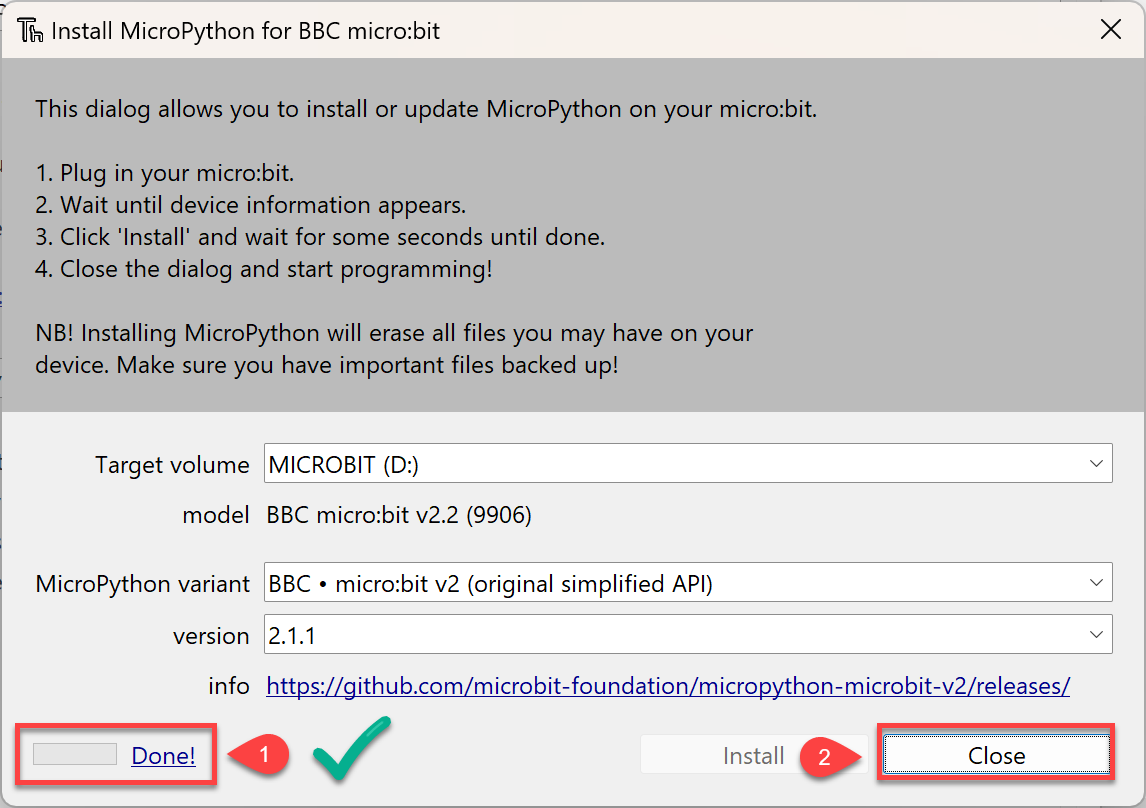
Wait until the progress shows Done (1), then click Close (2).
The Thonny window
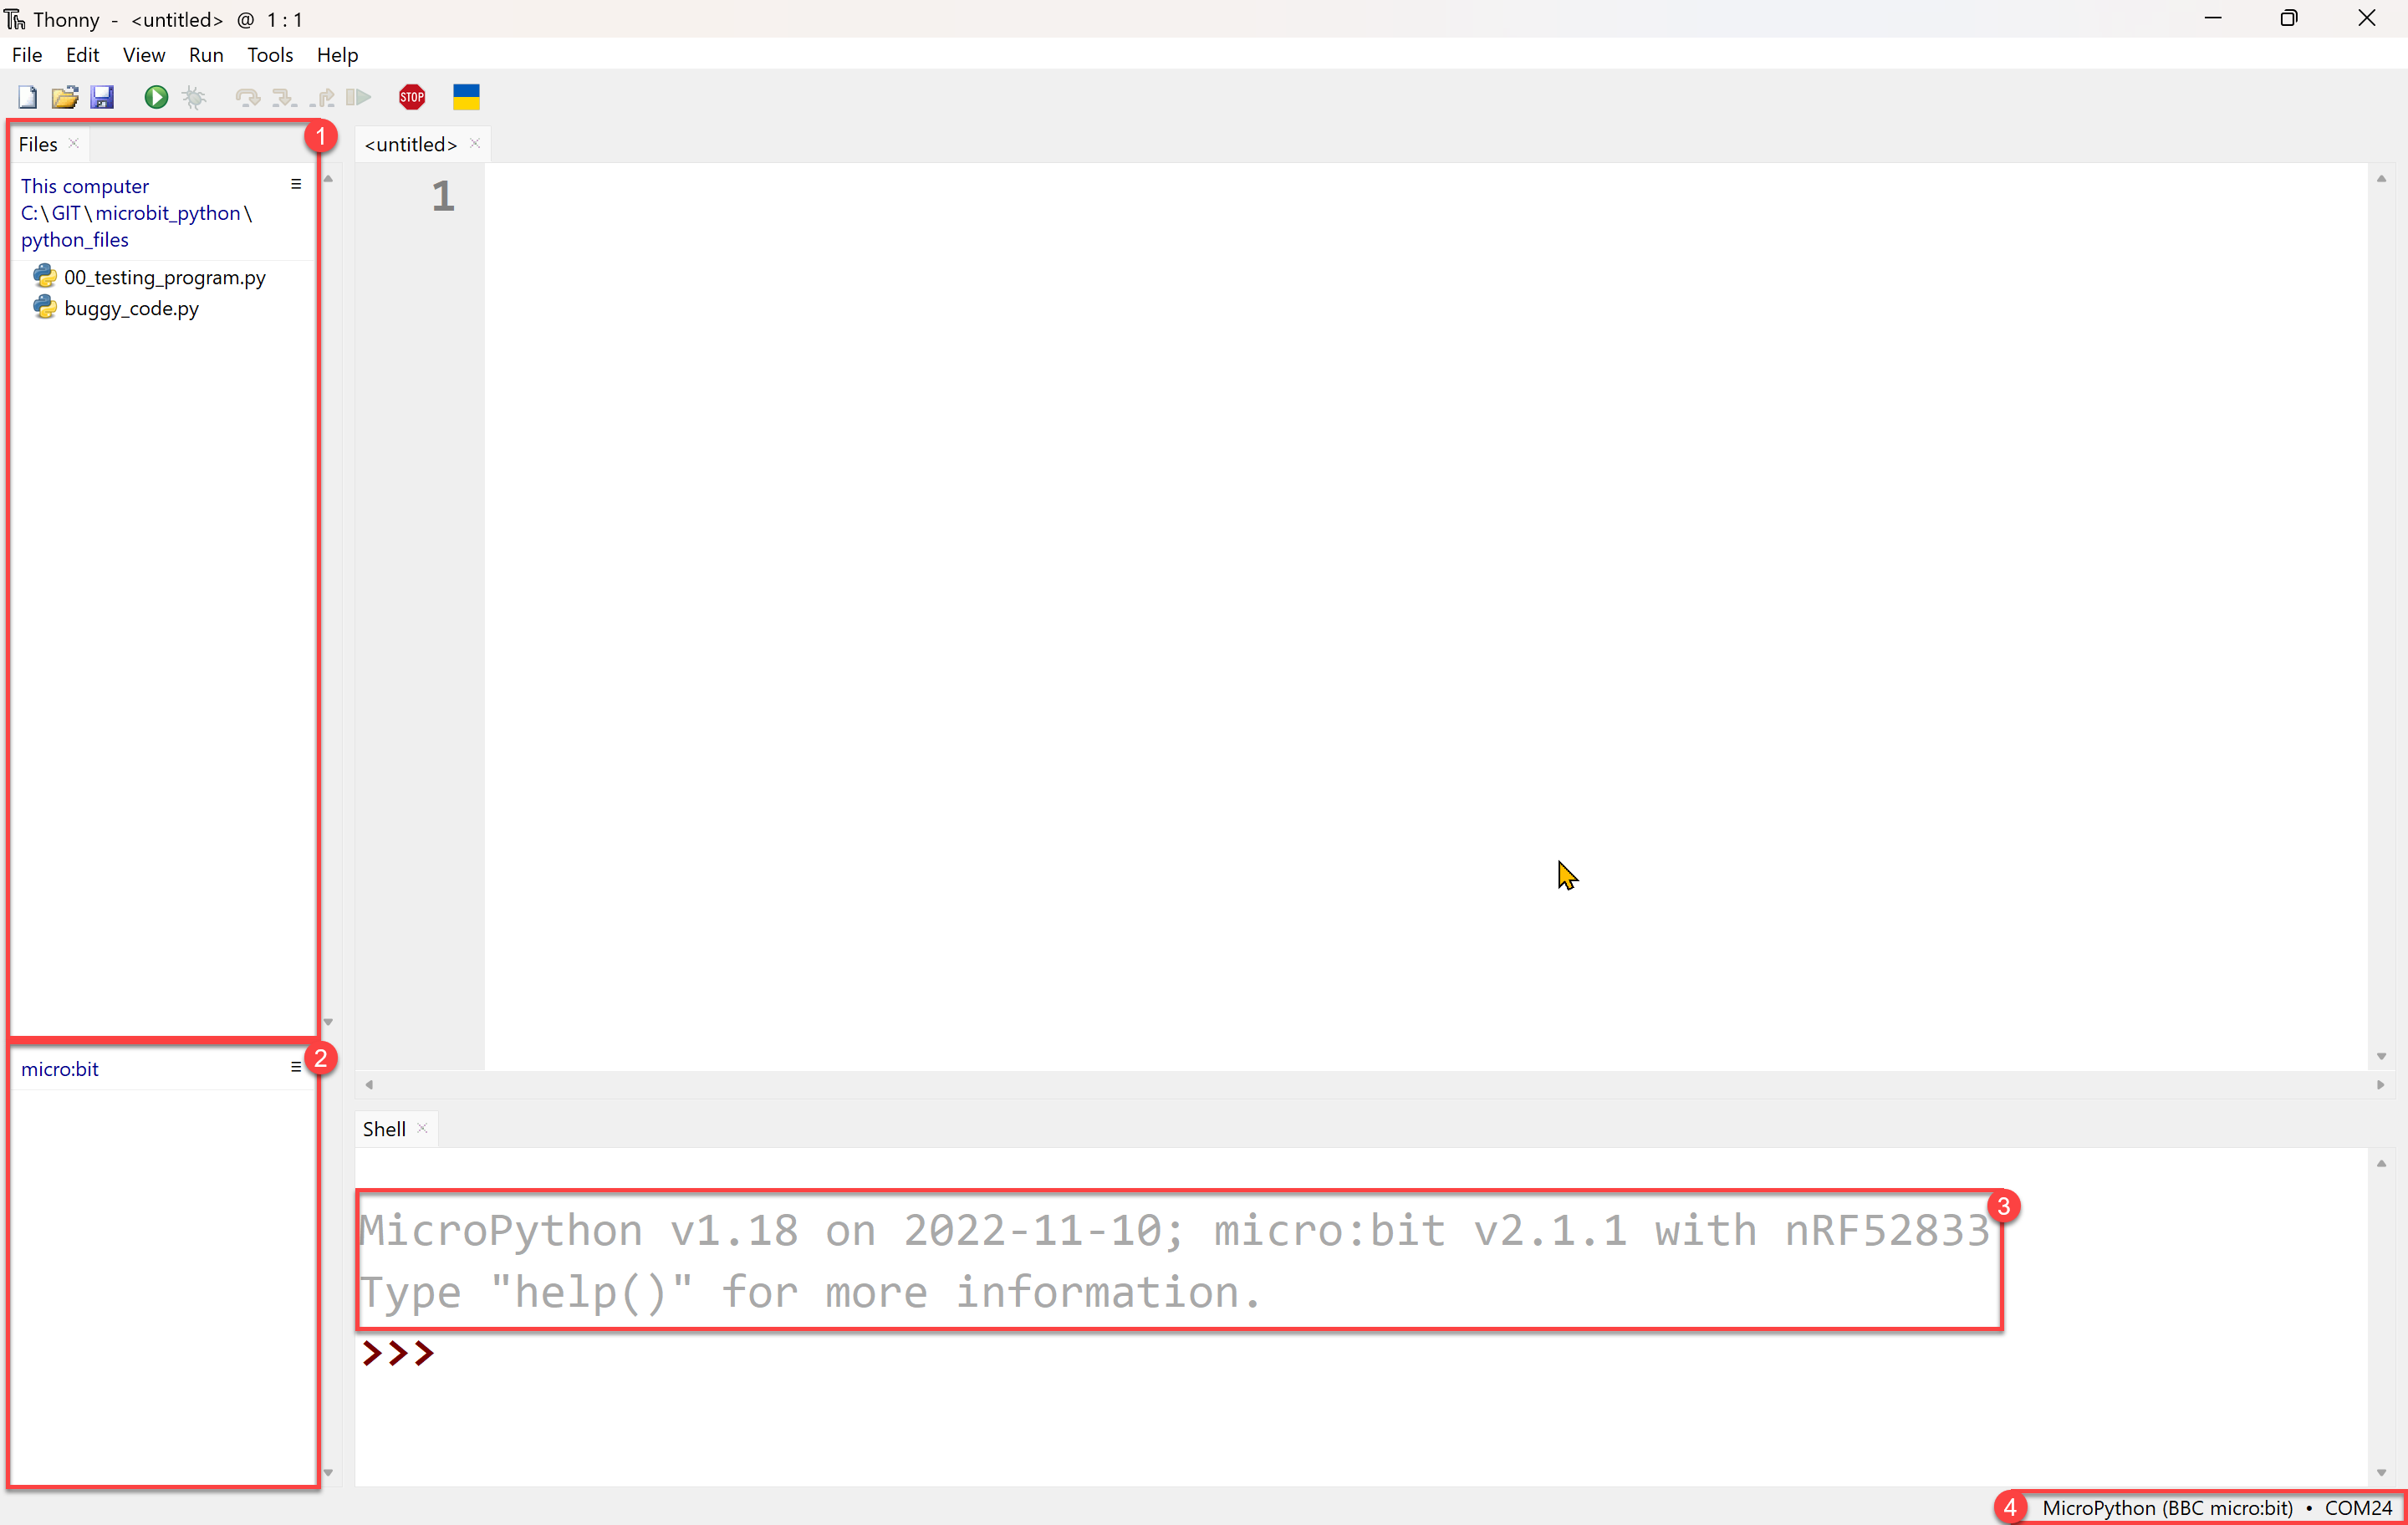
Thonny is now set up. Your screen should look similar to the one below.
- This computer → the files on your computer
- BBC micro:bit → the files on the micro:bit
- Shell → shows the MicroPython version and the micro:bit version
- Status bar → shows that you are connected to a micro:bit and the port it uses
Tutorial files
All the example and exercise files we will use in this course are in this zip file: microbit_tutorials.zip
- Download the zip file.
- Extract it into your Technologies folder.
- In Thonny's Files panel, navigate to the new microbit_tutorials folder.
Inside you will find a folder for each page of this site (for example, display). Inside each of those is a folder for each example and exercise, each containing its own main.py.