Welcome screen
To get started, we will create a welcome screen for the game. This is a simple way to introduce the key concepts and processes you will use throughout the course.
Planning
Wireframe
Wireframes
A wireframe is a simple plan for a website or app. It shows where things like buttons, images, and text will go on the screen.
It focuses on layout, not colours or small details.
Wireframes help you plan and explain your ideas before you build the final design, like sketching before creating a finished drawing.
Below is a wireframe of the welcome screen.
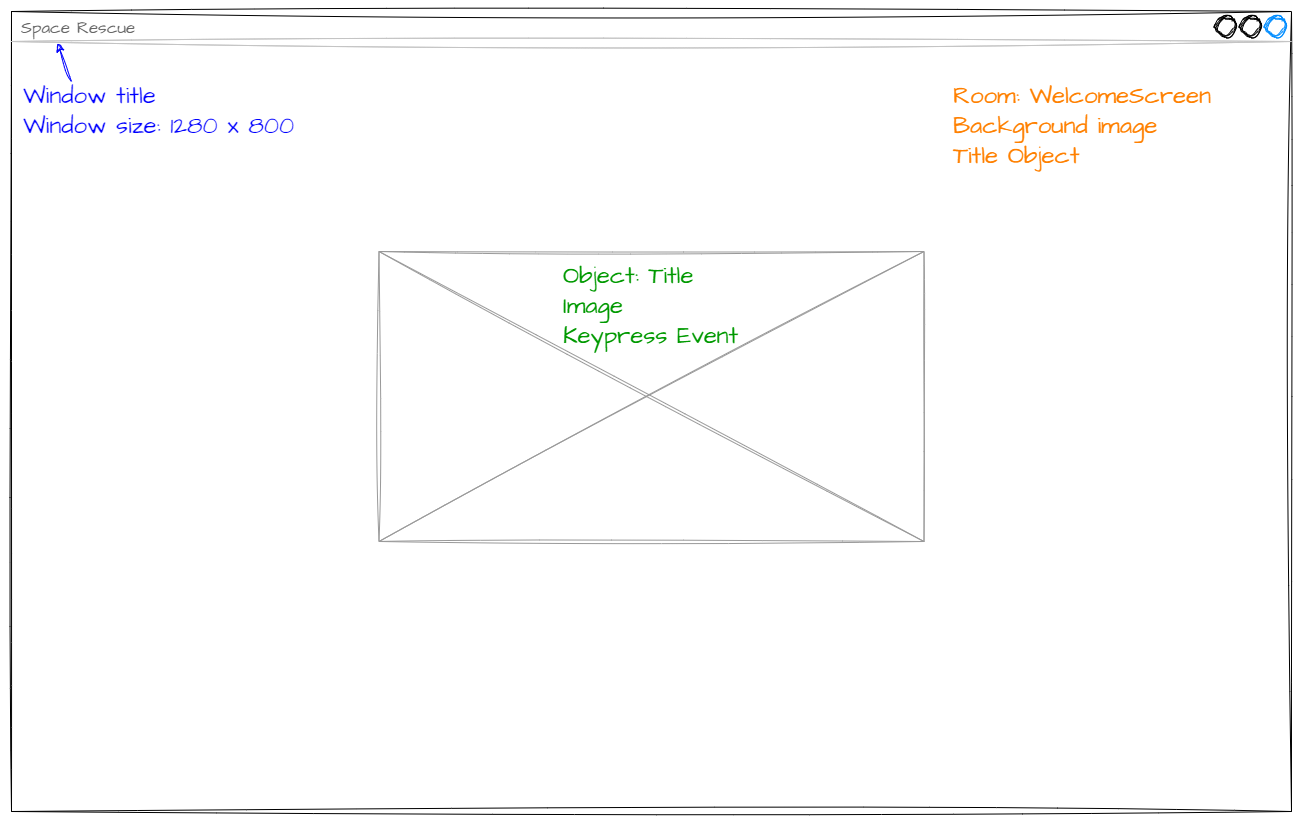
This wireframe shows three parts of the program we need to work on:
the game window (blue text):
this is the window that displays the game
we need to change its size and title
the WelcomeScreen room (orange text):
this is the main area inside the window where the game runs
it includes a background image and the Title object
the Title object (green text):
shown as a placeholder (a box with an X)
it uses an image
it responds when the space key is pressed
Class diagram
We now know what the screen will look like, but we also need to think about the class diagram. Check out Deepest Dungeon if you need a refresher on class diagrams.
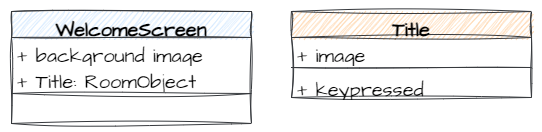
We can see that the WelcomeScreen class has two attributes:
a background image
a
TitleRoomObject
We can also see that the Title class has:
an
imageattributea
key_pressedmethod
This means there are four tasks we need to complete to create the welcome screen:
Adjust the window values
Create the
WelcomeScreenRoomCreate the
TitleRoomObjectAdd the
TitleRoomObject to theWelcomeScreenRoom
Let’s get started.
Adjust window values
GameFrame/Globals.py
The window settings are in the Globals.py file inside the GameFrame folder, so open that file.
To change the window size, update the SCREEN_WIDTH and SCREEN_HEIGHT values:
7SCREEN_WIDTH = 1280
8SCREEN_HEIGHT = 800
Then update the window_name value:
15# - Set the Window display name - #
16window_name = 'Space Rescue'
Save the Globals.py file using:
Windows:
Ctrl + SmacOS:
Command + S
Create WelcomeScreen Room
Let’s check the GameFrame documentation to see how to create a Room.
Rooms/WelcomeScreen.py
Create a new file in the Rooms folder called WelcomeScreen.py.
In this file, you will create a WelcomeScreen class. This class will be a subclass of the Level class from GameFrame.
Start by importing the Level class from GameFrame:
1from GameFrame import Level
Now create the WelcomeScreen class.
Follow the documentation and add the code shown below.
1from GameFrame import Level
2
3class WelcomeScreen(Level):
4    """
5    Intial screen for the game
6    """
7    def __init__(self, screen, joysticks):
8        Level.__init__(self, screen, joysticks)
Code Explanation
Let’s break this down:
line 3: defines the class → it is set up as a subclass of the
Levelclasslines 4–6: a docstring that explains what the class does
line 7: the
__init__method → runs automatically when aWelcomeScreenobject is createdline 8: calls the
__init__method of theLevelparent class → this allowsWelcomeScreento inherit all attributes and methods fromLevel
Now save the WelcomeScreen.py file.
Testing WelcomeScreen
Now that we have made the welcome screen, let’s run the game and see what happens.
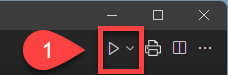
Open MainController.py, then click the play button in the top right-hand corner.
That did not go to plan. You will probably see the following error:
Traceback (most recent call last):
  File "d:\GIT\space_rescue_pygame\MainController.py", line 34, in <module>
    room = class_name(screen, joysticks)
           ^^^^^^^^^^^^^^^^^^^^^^^^^^^^^
TypeError: 'module' object is not callable
Have a close look at this error. I guarantee this is not the last time you will see it, that’s why I purposely caused it.
Reading the error it is really obscure what the problem. Remember when looking at the file structure I said that if you add a new Room or Object you need to link it to GameFrame using the __init__.py file. This is the kind of error that occurs when you forget.
Rooms/__init__.py
To remedy this error, open the __init__.py file in the Rooms folder and add the following code:
1from Rooms.WelcomeScreen import WelcomeScreen
Save the __init__.py file, and run your program again using the MainController.py.
You should now have a screen like this:
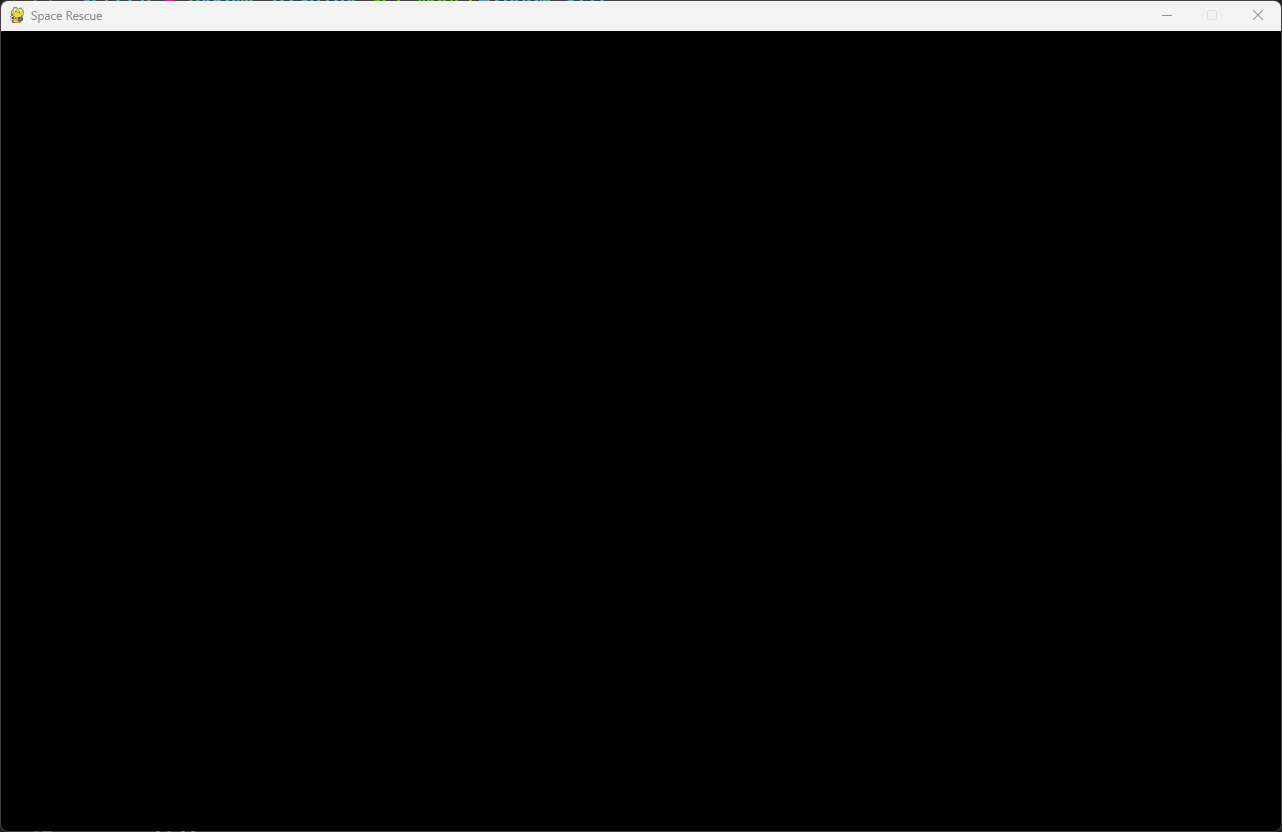
Not very exciting, but it’s the correct size, and the window title reads Space Rescue, so that’s a start.
Adding the background
Let’s make it less boring by adding a background image. Again, check the GameFrame docs to see how we can do this.
You will see that there is a method set_background_image which takes an image file. So we will have to call this method, but when? Well, we want the background to appear as soon as the room is created, so, it needs to be called in the __init__ method.
Rooms/WelcomeScreen.py
Go back to the WelcomeScreen.py file and then add the highlighted code to the __init__ method.
 1from GameFrame import Level
 2
 3class WelcomeScreen(Level):
 4    """
 5    Intial screen for the game
 6    """
 7    def __init__(self, screen, joysticks):
 8        Level.__init__(self, screen, joysticks)
 9
10        # set background image
11        self.set_background_image("Background.png")
Breaking that down:
line 10: structural comment to explain what is happening (really good habit to develop).
line 11:
self→ remember in OOP the need to refer all actions to the current instance of the object (self)set_background_iamge→ a method inherited from theLevelparent class."Background.png"→ image file in theimagesfolder (go to the folder and see if you can find it).
Save WelcomeScreen.py and then run the program again using MainController.py.
Create Title RoomObject
Note that we have a Room we can place the Title RoomObject inside it. So let’s check the GameFrame docs to see how to do this. This is a similar process to creating a Room:
Create a new file in the
ObjectsfolderImport the parent class
Initialise the class
Add new file to the
__init__.pyfile.
Notice that the RoomObject class has many more methods. These are used to implement the game logic.
Objects/Title.py
Open the Objects folder create a new file and call it Title.py.
In Title.py import the parent class using the following code:
1from GameFrame import RoomObject
Now create your Title class using the code below:
1from GameFrame import RoomObject
2
3class Title(RoomObject):
4    """
5    The object for displaying the title
6    """
7    def __init__(self, room, x, y):
8        RoomObject.__init__(self, room, x, y)
This code is very similar to the code to create a the WelcomeScreen class. It creates the class, initialises the class, and runs the parent class’ __init__ in order to inherent the attributes and methods.
Next we need to add an image to the object. Add the highlighted code below
 1from GameFrame import RoomObject
 2
 3class Title(RoomObject):
 4    """
 5    The object for displaying the title
 6    """
 7    def __init__(self, room, x, y):
 8        RoomObject.__init__(self, room, x, y)
 9
10        # set image
11        image = self.load_image("Title.png")
12        self.set_image(image,800,350)
This is fairly different to how we added an image to the WelcomeScreen room, so let’s unpack it:
line 10: a structural comment
line 11: retrieves
"Title.png"from the Images folder → stores it in theimagevariableline 12: assigns the image variable to this (self) RoomObject
Note
800and350this is the width and the height of the image
Determine image width and height
The easiest way to work out the height and width of an image is to open the image in VS Code and then look at the status bar at the bottom right of the screen.

Finally save Title.py.
Objects/__init__.py
Open the __init__.py in the Objects folder and add the following code:
1from Objects.Title import Title
Keeping workspace clean
During these tutorials, you will be moving between many different files, even files with the same name, but in different folder (eg. __init__.py).
To reduce the chance of working in the wrong file, get into the habbit of closing a file once you have finished with it.
Save __init__.py and close it.
Now run MainController.py to test your code. Nothing should change, because we haven’t added the RoomObject into the Room yet. This was just to check that there are no errors in your code so far.
Add Title RoomObject to WelcomeScreen Room
Now that we have made the Title RoomObject and the WelcomeScreen Room, we can put them together.
Rooms/WelcomeScreen.py
Open WelcomeScreen.py and add the code highlighted below:
 1from GameFrame import Level
 2from Objects.Title import Title
 3
 4class WelcomeScreen(Level):
 5    """
 6    Intial screen for the game
 7    """
 8    def __init__(self, screen, joysticks):
 9        Level.__init__(self, screen, joysticks)
10
11        # set background image
12        self.set_background_image("Background.png")
13
14        # add title object
15        self.add_room_object(Title(self, 240, 200))
Breaking that down:
line 2: imports the Title RoomObject we just created
line 14:
add_room_object→ a Level method that adds RoomObjects to RoomsTitle(self, 240, 200)→ creates a newTitleRoomObject and tells it that it belongs to this room at the position ofxof240andyof200.
Pygame screen coordinates
Pygame screen coordinates start with (0,0) in the top lefthand corner and increase as you move right and down. For example, on our screen the top left is (0,0) whilst the bottom right is (1279,799)
Save WelcomeScreen.py and close it.
Testing
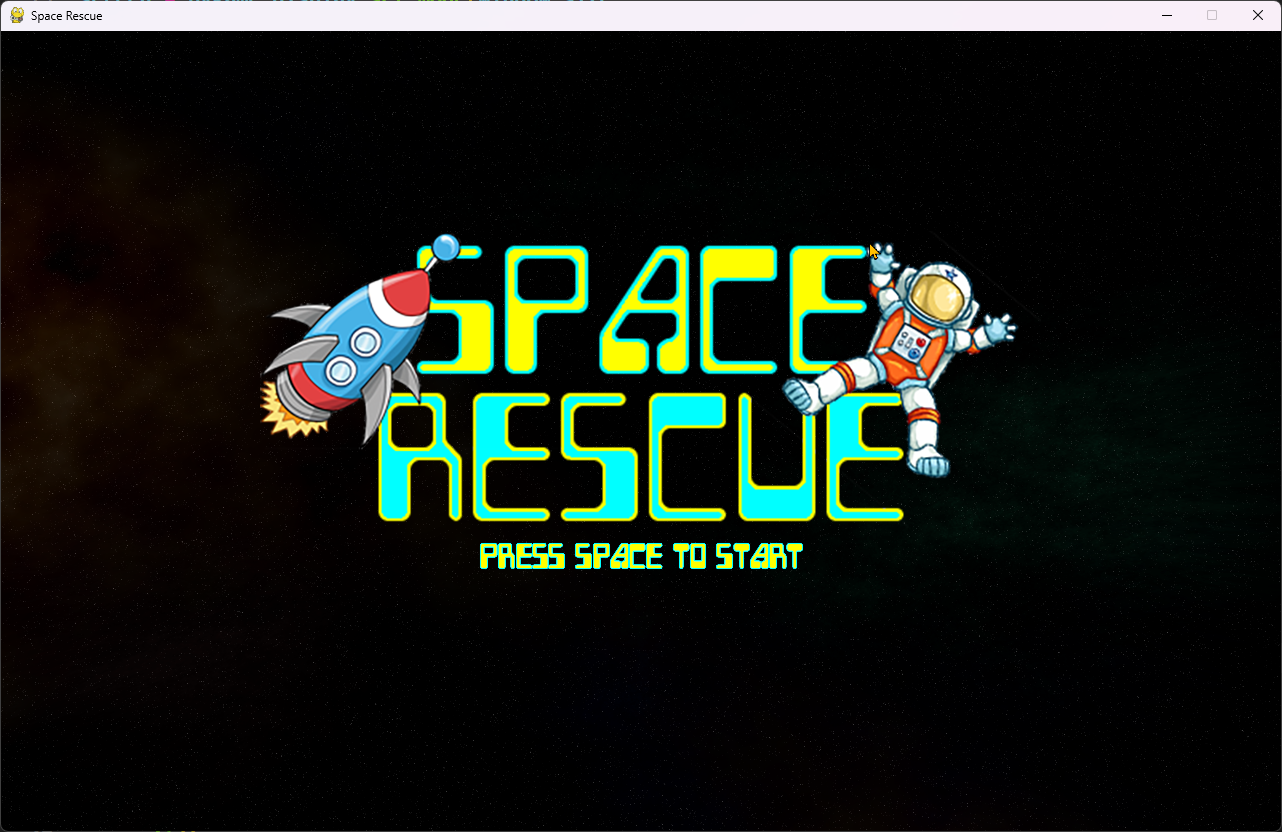
Now we have our welcome screen ready, it’s time to test it.
Open MainController.py and run it. Your screen should look like this:
Commit and Push
Now that we have finished a section of code and we have tested it to ensure it works, we should make a Git commit. Each commit creates an easy roll-back point. So if we break a our code, we can always return to a point that it worked.
To do this:
In GitHub Desktop go to the bottom left-hand box and write into the summary Created WelcomeScreen.
Click on Commit to main
Click on Push origin
Now the work from this lesson is committed and synced with the online repo.
Completed file states
Below are all the files we used in this lesson in their finished state. Use this to check if your code is correct.
GameFrame/Globals.py
 1class Globals:
 2
 3    running = True
 4    FRAMES_PER_SECOND = 30
 5
 6    SCREEN_WIDTH = 1280
 7    SCREEN_HEIGHT = 800
 8
 9    SCORE = 0
10
11    # - Set the starting number of lives - #
12    LIVES = 3
13
14    # - Set the Window display name - #
15    window_name = 'Space Rescue'
16
17    # - Set the order of the rooms - #
18    levels = ["WelcomeScreen", "Maze", "ScrollingShooter", "BreakOut"]
19
20    # - Set the starting level - #
21    start_level = 0
22
23    # - Set this number to the level you want to jump to when the game ends - #
24    end_game_level = 4
25
26    # - This variable keeps track of the room that will follow the current room - #
27    # - Change this value to move through rooms in a non-sequential manner - #
28    next_level = 0
29
30    # - Change variable to True to exit the program - #
31    exiting = False
32
33
34# ############################################################# #
35# ###### User Defined Global Variables below this line ######## #
36# ############################################################# #
37
38    total_count = 0
39    destroyed_count = 0
Rooms/WelcomeScreen.py
 1from GameFrame import Level
 2from Objects.Title import Title
 3
 4class WelcomeScreen(Level):
 5    """
 6    Intial screen for the game
 7    """
 8    def __init__(self, screen, joysticks):
 9        Level.__init__(self, screen, joysticks)
10
11        # set background image
12        self.set_background_image("Background.png")
13
14        # add title object
15        self.add_room_object(Title(self, 240, 200))
Rooms/__init__.py
1from Rooms.WelcomeScreen import WelcomeScreen
Objects/Title.py
 1from GameFrame import RoomObject
 2
 3class Title(RoomObject):
 4    """
 5    The object for displaying the title
 6    """
 7    def __init__(self, room, x, y):
 8        RoomObject.__init__(self, room, x, y)
 9
10        # set image
11        image = self.load_image("Title.png")
12        self.set_image(image,800,350)
Objects/__init__.py
1from Objects.Title import Title