Motors
Pybrick Documentation
To explore all Pybricks’ features check the Pybricks documentaion. This can also be seen in the right-hand panel of the Pybricks IDE.
Although your robot only has on type of motor, the LEGO Spike Prime kit actually has two:
Medium Angular Motor
Large Angular Motor
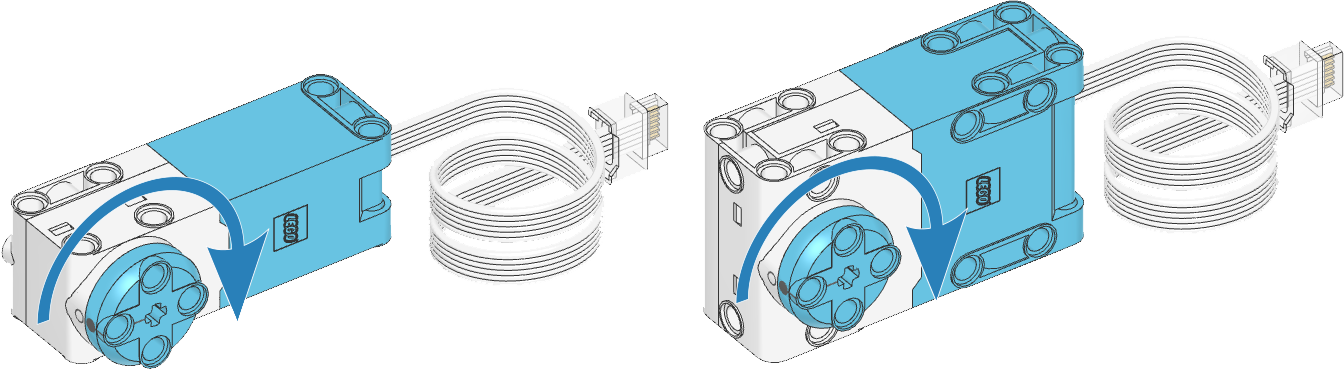
Both motors are run using the same code. The only difference is the relative power.
DC Motor vs Encoded Motors
The Spike Prime motors are called Angular, because you can program them to turn an exact number of degrees. This is possible because they have a built-in sensor called an encoder. Encoders record how many degrees the motor has turned.
Motors without encoders are called DC motors (direct current). The only programming options DC motors provide are turn on and turn off.
Initialisation
Before you can program the motors, you need to create initialize a motor object for each motor you wish to use.
This is achieved through calling the Motor class. You will need to pass minimum arguments:
port → the port the motor is plugged into. You will need to use one of Pybricks’ constants (eg.
Port.A)positive direction → this is the direction you want the wheel to turn when you enter a positive speed value. You will need to use one of Pybricks’ constants (eg.
Direction.CLOCKWISE)
For example, to initialize the right motor on your robot your would use:
right_motor = Motor(Port.B, Direction.CLOCKWISE)
Motor Running Forever
Motor Running Forever Functions
There are two functions that make the motors run forever:
run(speed)→ Runs the motor at a constant speed.dc(duty)→ Rotates the motor at a given duty cycle (also known as “power”).
Motor Running Forever Examples
Time to explore how these two functions can be used.
Create a new file called
motors_run_forever.pyType the code below into the file
Predict what you think will happen.
Run your code
 1from pybricks.hubs import PrimeHub
 2from pybricks.pupdevices import Motor, ColorSensor, UltrasonicSensor, ForceSensor
 3from pybricks.parameters import Button, Color, Direction, Port, Side, Stop
 4from pybricks.robotics import DriveBase
 5from pybricks.tools import wait, StopWatch
 6
 7# --- SETUP
 8# start components
 9hub = PrimeHub()
10left_motor = Motor(Port.E, Direction.COUNTERCLOCKWISE)
11right_motor = Motor(Port.F, Direction.CLOCKWISE)
12
13# store variables
14
15# --- RUNNING
16while True:
17    # read sensor data
18
19    # process data
20
21    # output data
22    left_motor.run(1000)
23    right_motor.run(1000)
24    wait(1000)
25
26    left_motor.dc(50)
27    right_motor.dc(50)
28    wait(1000)
Investigate
lines 3 - 7 → imports all the Pybricks command for use with your robot
lines 10 - 12 initialises the components of your robot
line 10 → initialise the hub
line 11 → initialise the left motor in port A
Positive direction is counter-clockwise → look at the left wheel, which direction does it need to turn for your robot to move forwards?
line 12 → initialise the right motor in port B
Positive direction is clockwise → look at the right wheel, which direction does it need to turn for your robot to move forwards?
line 15 → creates a infinite loop
line 16 → sets
left_motorto1000. This turns the motor at 1000 degrees a secondline 17 → sets
right_motorto1000. This turns the motor at 1000 degrees a secondline 18 → makes the robot wait for a second before moving onto the next command
line 20 → sets
left_motorto50. This turns the motor at 50% powerline 21 → sets
right_motorto50. This turns the motor at 50% power
Modify
what happens if both motors’ positive direction is the same?
what happens if you comment out all the wait commands?
work out how many degrees per second is produced by a motor at 50% power.
Motor Stop
Motor Stop Functions
Pybricks provides three functions to stop motors, each having a slightly different effect:
Motor Stop Examples
Explore how these three functions can be used.
Create a new file called
motors_stop.pyType the code below into the file
Predict what you think will happen.
Run your code
 1from pybricks.hubs import PrimeHub
 2from pybricks.pupdevices import Motor, ColorSensor, UltrasonicSensor, ForceSensor
 3from pybricks.parameters import Button, Color, Direction, Port, Side, Stop
 4from pybricks.robotics import DriveBase
 5from pybricks.tools import wait, StopWatch
 6
 7# --- SETUP
 8# start components
 9hub = PrimeHub()
10left_motor = Motor(Port.E, Direction.COUNTERCLOCKWISE)
11right_motor = Motor(Port.F, Direction.CLOCKWISE)
12
13# store variables
14
15# --- RUNNING
16while True:
17    # read sensor data
18
19    # process data
20
21    # output data
22    hub.light.on(Color.GREEN)
23
24    left_motor.dc(100)
25    right_motor.dc(100)
26    wait(1000)
27
28    left_motor.stop()
29    right_motor.stop()
30    wait(500)
31
32    hub.light.on(Color.ORANGE)
33
34    left_motor.dc(100)
35    right_motor.dc(100)
36    wait(1000)
37
38    left_motor.brake()
39    right_motor.brake()
40    wait(500)
41
42    hub.light.on(Color.VIOLET)
43
44    left_motor.dc(100)
45    right_motor.dc(100)
46    wait(1000)
47
48    left_motor.hold()
49    right_motor.hold()
50    wait(500)
Investigate
lines 3 - 7 → imports all the Pybricks command for use with your robot
lines 10 - 12 initialises the components of your robot
line 15 → creates a infinite loop
line 16 → set status light to green
lines 18 - 20 → runs both motors at 100% power for 1 second
lines 22 - 23 → stop both motors using the
stop()methodline 24 wait half a second
line 26 → set status light to orange
lines 28 - 30 → runs both motors at 100% power for 1 second
lines 32 - 33 → stop both motors using the
brake()methodline 34 wait half a second
line 36 → set status light to orange
lines 38 - 40 → runs both motors at 100% power for 1 second
lines 42 - 43 → stop both motors using the
hold()methodline 44 wait half a second
Modify
what happens when you only stop one motor? Is it different for the different stopping functions?
what happens when you comment out all the
waitfunctions?
Inidcating current robot logic
One of the difficult aspects of programming robots is working out what part of the code the robot is currently running. This presents a signifiacnt problem when debugging problematic code.
One method to reduce this problem, is using outputs to indicate which part of the code is being run.
For example, the code above changes the colour of the status light to indicate which stopping method is used:
green →
stop()orange →
brake()violet →
hold()
Motor Fixed Amount
Motor Fixed Amount Functions
Pybricks has four functions that can run a motor for a designated amount:
run_time(speed, time, then=Stop.HOLD, wait=True)→ Runs the motor at a constant speed for a given amount of time.run_angle(speed, rotation_angle, then=Stop.HOLD, wait=True)→ Runs the motor at a constant speed by a given angle.run_target(speed, target_angle, then=Stop.HOLD, wait=True)→ Runs the motor at a constant speed towards a given target angle.track_target(target_angle)→ Tracks a target angle. This is similar torun_target(), but the usual smooth acceleration is skipped: it will move to the target angle as fast as possible.
Motors waiting
You will notice that run_time(), run_angle() and run_target() have a parameter called wait. By default this is set to True which means the program will wait for the motor to finish it fixed movement before moving onto the next line of code.
If you want both motors to run simultaneously, you need to set wait to False.
Motor Fixed Amount Example
Time to see these four functions in action.
Create a new file called
motors_run_fixed.pyType the code below into the file
Predict what you think will happen.
Run your code
 1from pybricks.hubs import PrimeHub
 2from pybricks.pupdevices import Motor, ColorSensor, UltrasonicSensor, ForceSensor
 3from pybricks.parameters import Button, Color, Direction, Port, Side, Stop
 4from pybricks.robotics import DriveBase
 5from pybricks.tools import wait, StopWatch
 6
 7# --- SETUP
 8# start components
 9hub = PrimeHub()
10left_motor = Motor(Port.E, Direction.COUNTERCLOCKWISE)
11right_motor = Motor(Port.F, Direction.CLOCKWISE)
12
13# store variables
14
15# --- RUNNING
16while True:
17    # read sensor data
18
19    # process data
20
21    # output data
22    hub.light.on(Color.BROWN)
23
24    left_motor.run_time(1000, 1000, Stop.COAST)
25    right_motor.run_time(1000, 1000, Stop.COAST)
26
27    hub.light.on(Color.VIOLET)
28
29    left_motor.run_angle(1000, 180)
30    right_motor.run_angle(1000, 180)
31
32    hub.light.on(Color.CYAN)
33
34    left_motor.reset_angle(0)
35    right_motor.reset_angle(0)
36    left_motor.run_target(1000, 180)
37    right_motor.run_target(1000, 180)
38
39    hub.light.on(Color.GRAY)
40
41    left_motor.reset_angle(0)
42    right_motor.reset_angle(0)
43    left_motor.track_target(180)
44    right_motor.track_target(180)
45
46    wait(1000)
Investigate
lines 3 - 7 → imports all the Pybricks command for use with your robot
lines 10 - 12 initialises the components of your robot
line 15 → creates a infinite loop
line 16 → set status light to brown
line 18 → runs the left motor at 1000 d/s for 1 second, then coasts to a stop
line 19 → runs the right motor at 1000 d/s for 1 second, then coasts to a stop
line 21 → set status light to violet
line 23 → runs the left motor at 1000 d/s for 180°
line 24 → runs the right motor at 1000 d/s for 180°
line 26 → set status light to cyan
line 28 → sets the left motor’s current position as 0°
line 29 → sets the left motor’s current position as 0°
line 30 → runs the left motor at 1000 d/s to position 180°
line 31 → runs the right motor at 1000 d/s to position 180°
line 33 → set status light to gray
line 35 → sets the left motor’s current position as 0°
line 36 → sets the left motor’s current position as 0°
line 37 → rapidly changes the left motor’s position to 180°
line 38 → rapidly changes the right motor’s position to 180°
line 40 → waits 2 seconds
Modify
what happens when you add
Falseas the last argument in line 18?what happens if you change
Stop.COASTtoStop.HOLDin line 18 and line 19?what happens if your comment out the
reset_angle()lines?
run_angle() vs run_target() vs track_target()
If you want to turn a your motor a specific number of degree you are better off using run_angle().
run_target() & track_target are better to use if you want to move a motor to a specific degree position between 0° and 359°.
Use run_target() if you want to control which direction the motor spins to get to the specified degree position.
Use track_target() if you want the motor to take the quickest direction to the specified degree position.